Modern cameras are pretty amazing, and most of the time, all you have to do is set the exposure to an automatic mode, point the camera, and click, and the exposure turns out pretty well. But then sometimes, it doesn’t. Learning how to fix those exposure problems (and better yet, predict them) is one of the major steps to being a photographer, not just a person with a camera. Luckily it’s very easy once you understand a couple of basic things. This article assumes you’re using an automatic exposure mode (Auto, Aperture Priority, Shutter Priority, or any of the beginner modes on the camera’s mode dial, like Sports, Portrait, Landscape, etc.).
Your Camera Expects Grey
Suppose you’re taking a picture of a plain black wall. Your camera doesn’t know what tone it is (light or dark); all it knows is that a certain amount of light is reflecting from it and reaching the light meter in the camera. Is that amount of light coming from a dark wall with bright light shining on it? Is it coming from a white wall with dim light shining on it? Both could produce the same reading from the light meter. So what does the camera do?
The camera plays it safe and just sets an exposure that makes it appear grey.

In fact, automatic light meters have been working on the same assumption for as long as they’ve existed: most people take pictures of middle-toned things most of the time.
And it’s a pretty safe assumption, as we know from how well our cameras have been able to expose photos for the past several decades. Most landscapes are mid tone. Most people’s skin and clothes average out to be mid-tones. Most buildings and streets and objects are mid-tones.
What About Color?
This means that if you take a picture of a black wall, with automatic exposure, it will come out looking grey. If you take a picture of a white wall, it will ALSO come out looking grey.

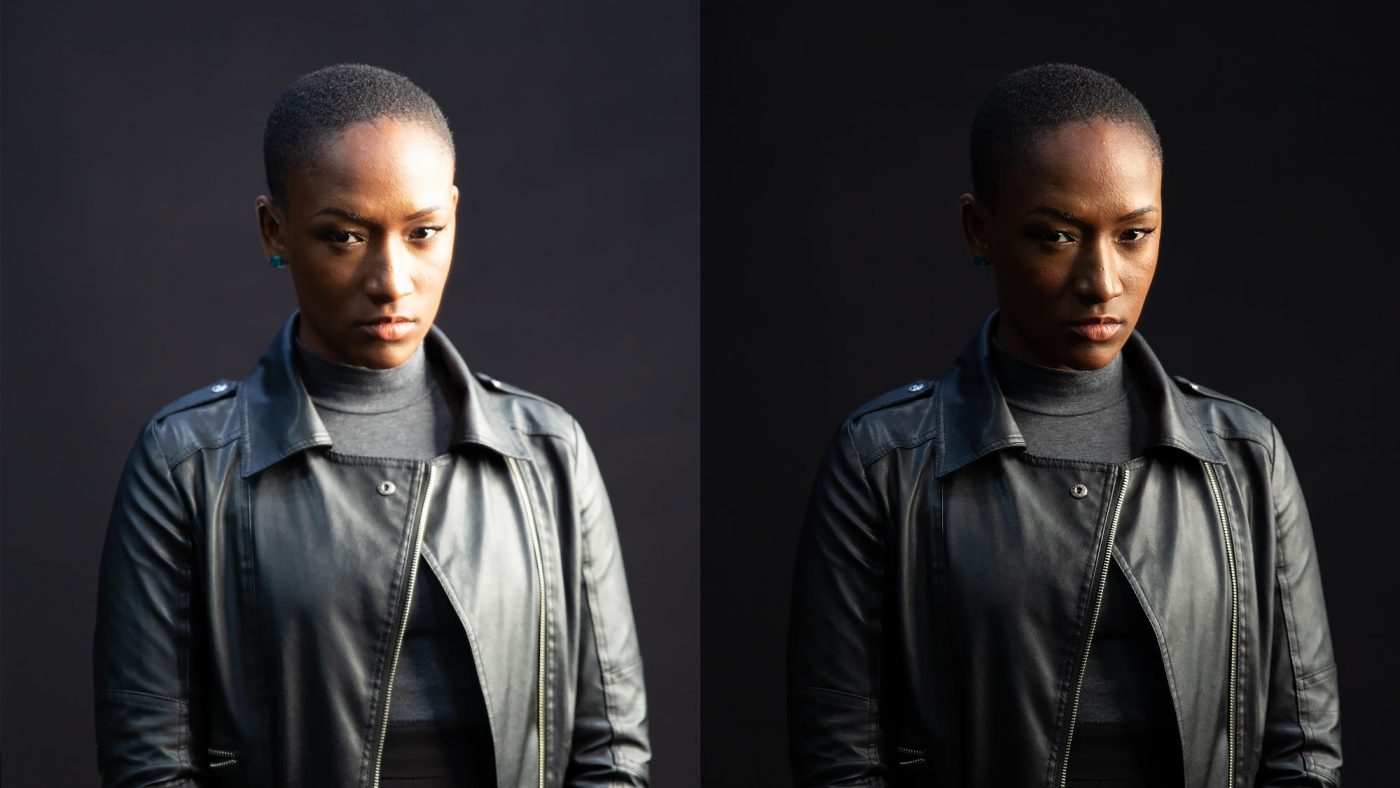
Before adjustments. Here we have a dark skinned model in dark clothes against a dark background. The camera tries to make it mid-tones instead, which makes the highlights in the image too bright and blown out. 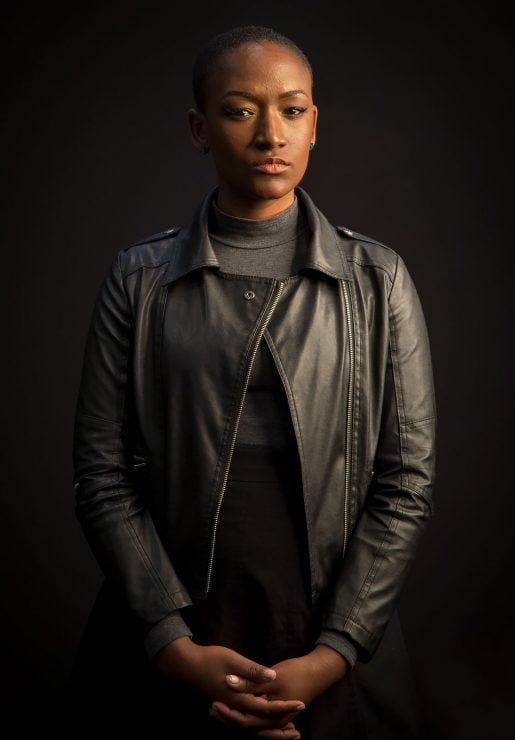
Here, I set the exposure compensation to -1.33, darkening the darks and protecting the highlights.
So What if You Don’t Want Grey?
Often, we don’t. Maybe we’re taking a picture of a snowy scene. Maybe we’re taking a picture of someone with dark skin against a dark background. How do we get it right?
The answer is Exposure Compensation.
It sounds a little intimidating, but it’s simple: it means that you move a pointer to one side to make the picture brighter and to the other side to make it darker. The slider will look slightly different from camera to camera, but usually something like this when you look through your camera’s viewfinder:
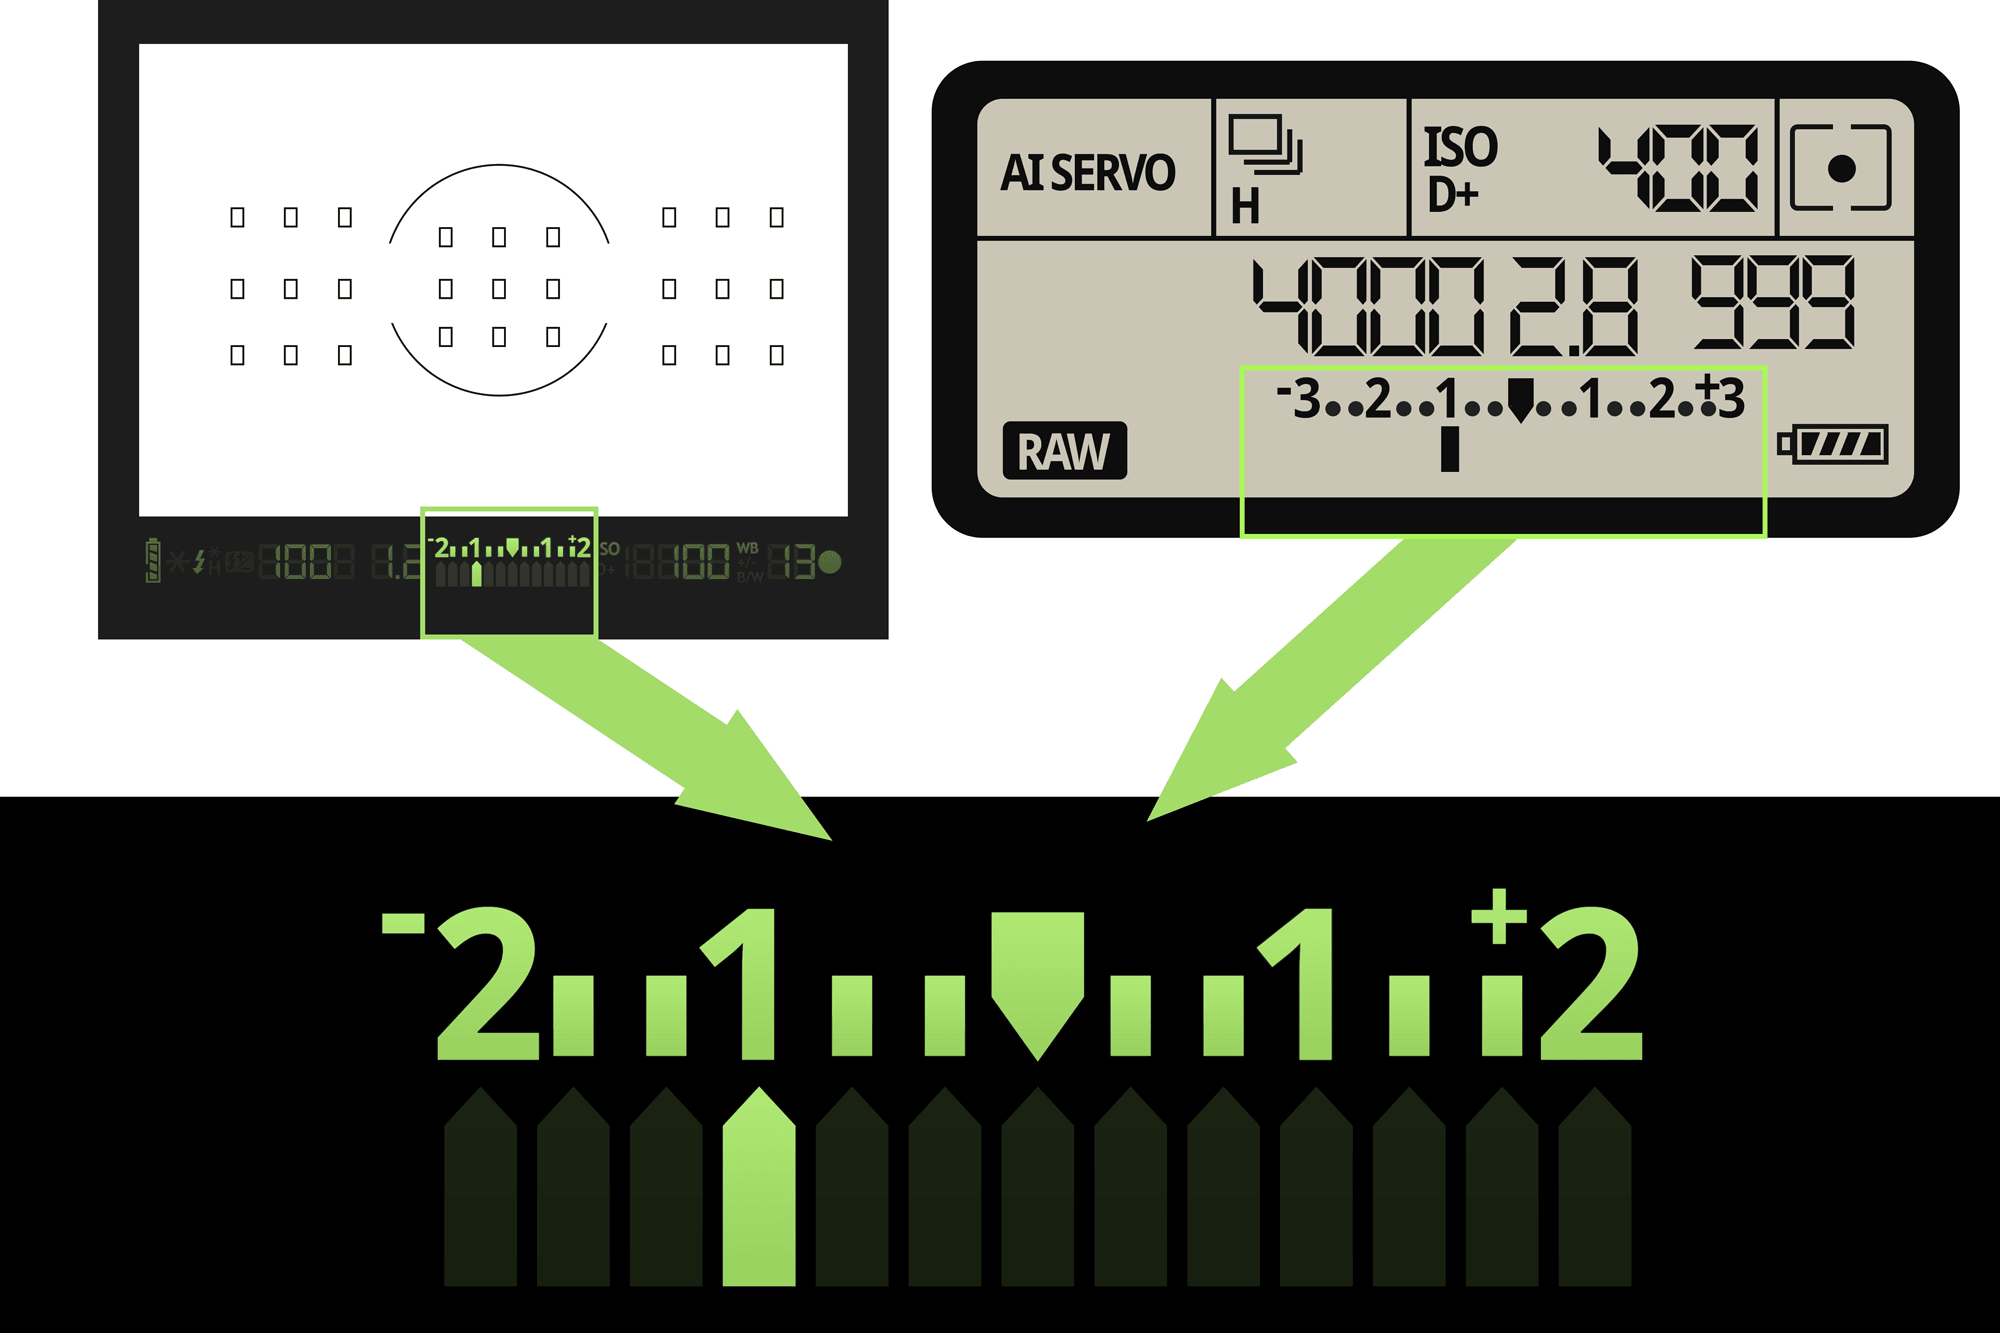
When the pointer is in the middle, the camera will use the automatic recommended exposure. When you move the pointer to -1, the camera sets the exposure to 1 f-stop1 Remember that 1 stop less exposure is equivalent to getting 1/2 the amount of light to the sensor. darker than recommended exposure. Similarly, +1 or +2 will get you one or two stops more exposure than what is recommended by the camera’s automatic meter.
What Does Exposure Compensation Change?
If you’re using auto ISO, then the camera may also change the ISO, regardless of what shooting mode you use, depending on your camera model.
In any case, using exposure compensation allows you to retain control of whatever you want to control; it only changes the exposure recommendation.
How do you set the exposure compensation?
Setting exposure compensation is different depending on your camera brand and model. Some cameras make it easier than others, but you should spend a moment with your camera’s manual and figure it out if you’re not sure. It’s worth it.
On Nikon cameras, you’ll see a +/- button, usually up near the shutter button. Once you press the button, you’ll be able to use the command-dial to move the pointer left or right on the exposure scale.

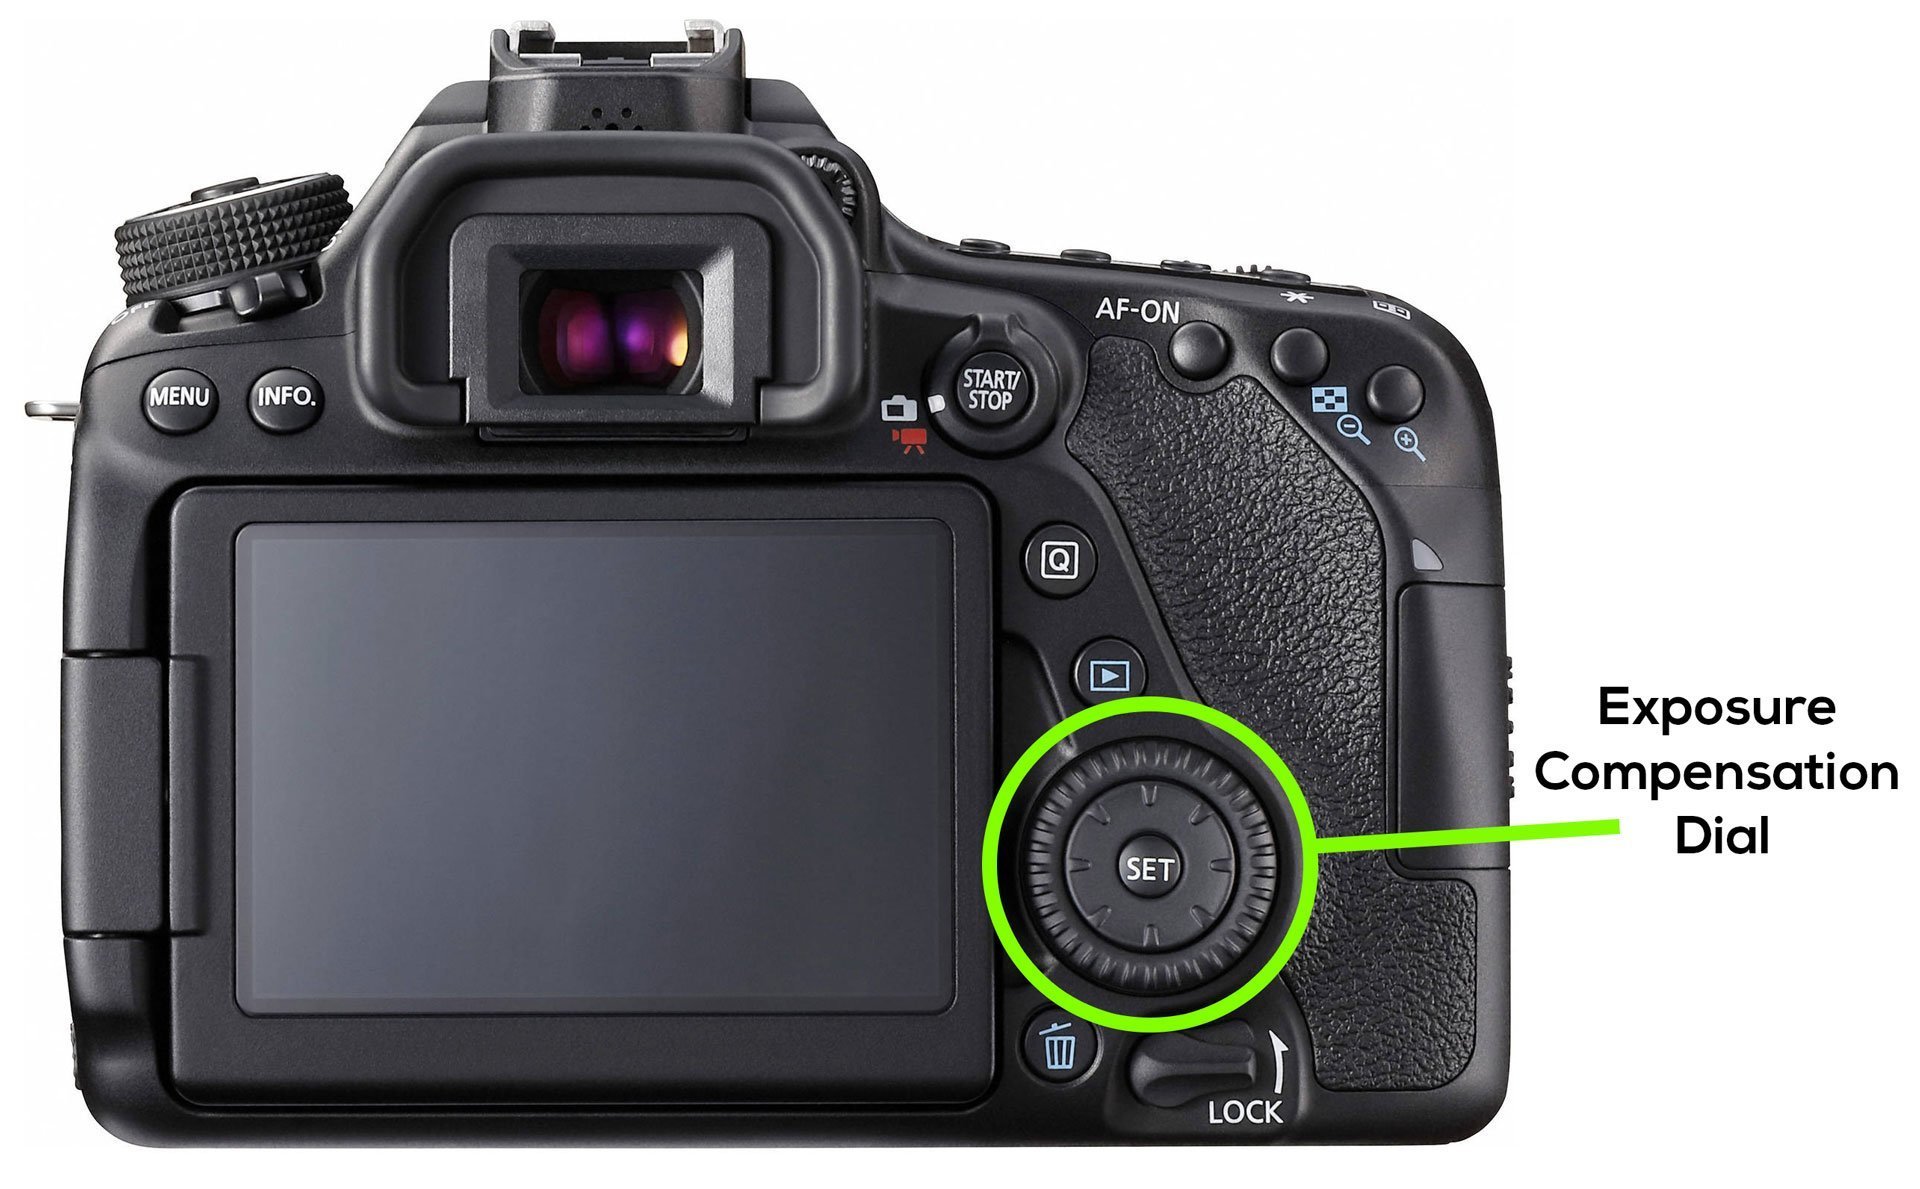
On all Canon cameras above the T7i, there’s a large thumb-dial on the back of the camera that gives you instant access to exposure compensation, and this has been true since the 1990s (and why I chose Canon when I began studying photojournalism in college). Turning it clockwise will make the picture brighter, counter-clockwise will make it darker.
Many Sony and Fuji cameras have a thumb dial on the top of the camera for the same purpose. Regardless of how you activate the feature, they all do the same thing: move the slider towards the “+” side and your image will get brighter, move it towards the “-” side and your image will get darker. In the custom settings of most DSLRs, you can choose whether the scale is in 1/2 or 1/3rd f-stop increments.
General Rules & Uses
First, A Few Quick Comments
Before I go any further, I’ll have to stop and discuss automatic light meters in a bit more depth.
Modern cameras have different light-metering modes that you can choose between. Center-weighted and spot metering do about the same thing: they look at the light in a small portion of the frame and set the exposure according to how bright that area is. Spot metering looks at a smaller area (make sure you know how to set yours; the meter icons don’t always make sense).
There’s also usually a mode that averages out the brightness from all across the frame, and sets the exposure according to that average. In modern digital cameras, there’s also frequently some sort of “intelligent” metering mode that compares the scene to a database of images, and sets the exposure according to those. When it works it’s handy, but when it doesn’t, it’s impossible to know how the camera is figuring out exposure.
Regardless of what metering mode you’re using, exposure compensation will help you fix the problem AFTER you take a test shot. With a little practice, you’ll be able to look at your first exposure and say “Ah ha! This is about a stop too dark” and make the adjustment and take the next shot.
But if you want to PREDICT the correct exposure and get it right the first time (to catch a moment at an event, or to capture a fleeting moment of light) then it helps to use center weighted or spot metering. That way, you’ll know what the camera is metering and what part of the scene it is trying to make grey (or mid-brightness).

A backlit photo using automatic exposure, no compensation. 
The same shot, but with +1.7 stops of exposure compensation added. I gained detail in the subject at the expense of the mountains in the background.
General Rules
Rule One: If you’re shooting something that is mostly white, set your exposure compensation to +2
If you camera is setting the exposure off of something that is white, it will set the exposure too low, to make it grey. This means that anything in the scene that is supposed to be middle toned will be very dark, and you’ll lose a lot of shadow detail, too. Setting the camera to +2 will keep mid-tones where they should be.
Rule Two: If you’re shooting something that is mostly black (or very dark), set your exposure to -2
Do this if you’re shooting for JPG and want the exposure to be correct, or if there are also brighter areas in the image that would get too bright with automatic exposure2 If you’re shooting RAW and the entire scene is dark, then there’s generally no harm (and some advantage) in over-exposing it, so you can skip this rule .
Common Situations
If you’re shooting a portrait with back-lighting (or against the sky), then the light coming from behind the subject is going to be much brighter than the subject’s face, which is the same to the light meter as shooting against a bright white background, and the face will be lost in shadow.
What do you do? Set the exposure compensation to +1 or +2, depending on how bright the background is. This brightens up the face, but will often cause the bright background to be too bright.
In the photo to the right, I set the exposure compensation to +1.3 , though I could have gone even higher, since the background detail is not very important in this image.
Similarly, if you’re shooting a product or model against a white background, the camera may meter on the white and under-expose the image to make it grey. This is a huge problem with beginners who are shooting products for websites; instead of the product looking nice against a clean white background, the whole image looks muddy against a light grey background.
Again, +2 or so will fix it.


On the other hand, people often miss very dramatic, dark images because the subject gets blown out against a dark background.
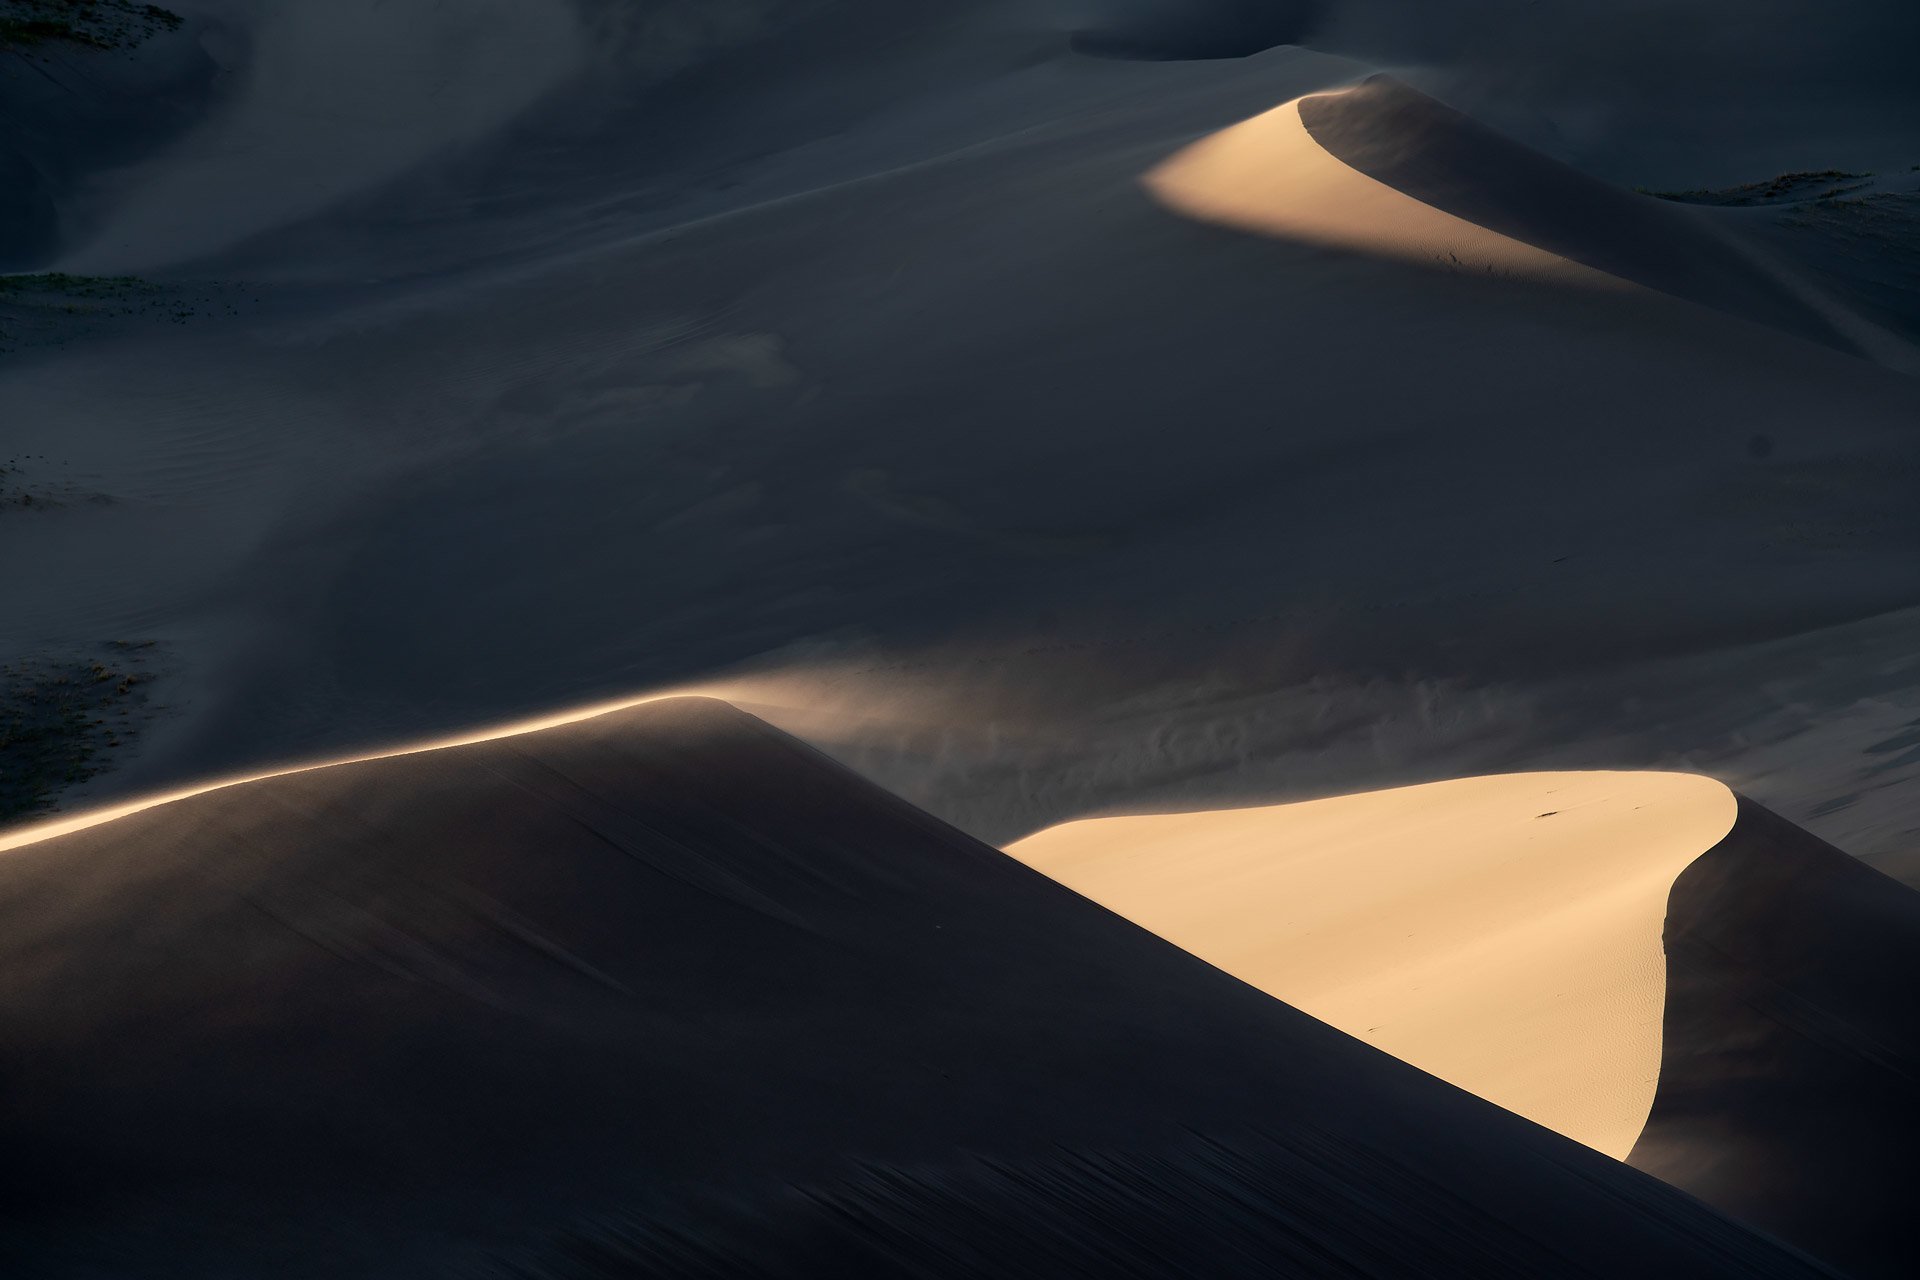
If you have a subject that is in the light and against a dark background, set the exposure compensation to -1 or -2. This will protect the brighter parts of the image from blowing out and losing all detail. This applies when your subject is in a spotlight on stage, in a sunbeam in a darker room, or simply if your overall scene is dark tones, but you want to keep the highlights in the parts that aren’t (eg, if you’re taking a detail shot of a black car).


This is not the only way to make exposure adjustments, but it is the fastest and easiest for the way that most photographers shoot. Like anything in photography, getting good at it takes some time and practice, and the more that you practice, the easier it will be to read a scene that you’re photographing and expose it correctly.
Back in the days of film, it was critical to get exposure just right. With certain slide films, being off by a third-stop could ruin an image.
Digital is now more forgiving, and as long as you don’t over-expose too much, a lot of detail can be pulled out of the shadows of RAW files during post-processing. Still, if you’re required to shoot JPG, getting it right in camera is very important, and no matter what you shoot, if you over-expose the highlights past clipping, they’re gone forever. Getting it right in camera, if nothing else, will save you time later when it comes to post-processing.
Questions? Comments?
As always, I’m interested to hear whether anyone found this helpful, confusing, or otherwise. If you have any questions that might help clear things up, please let me know in the comment section below!
