
Why Are My Pictures Blurry?
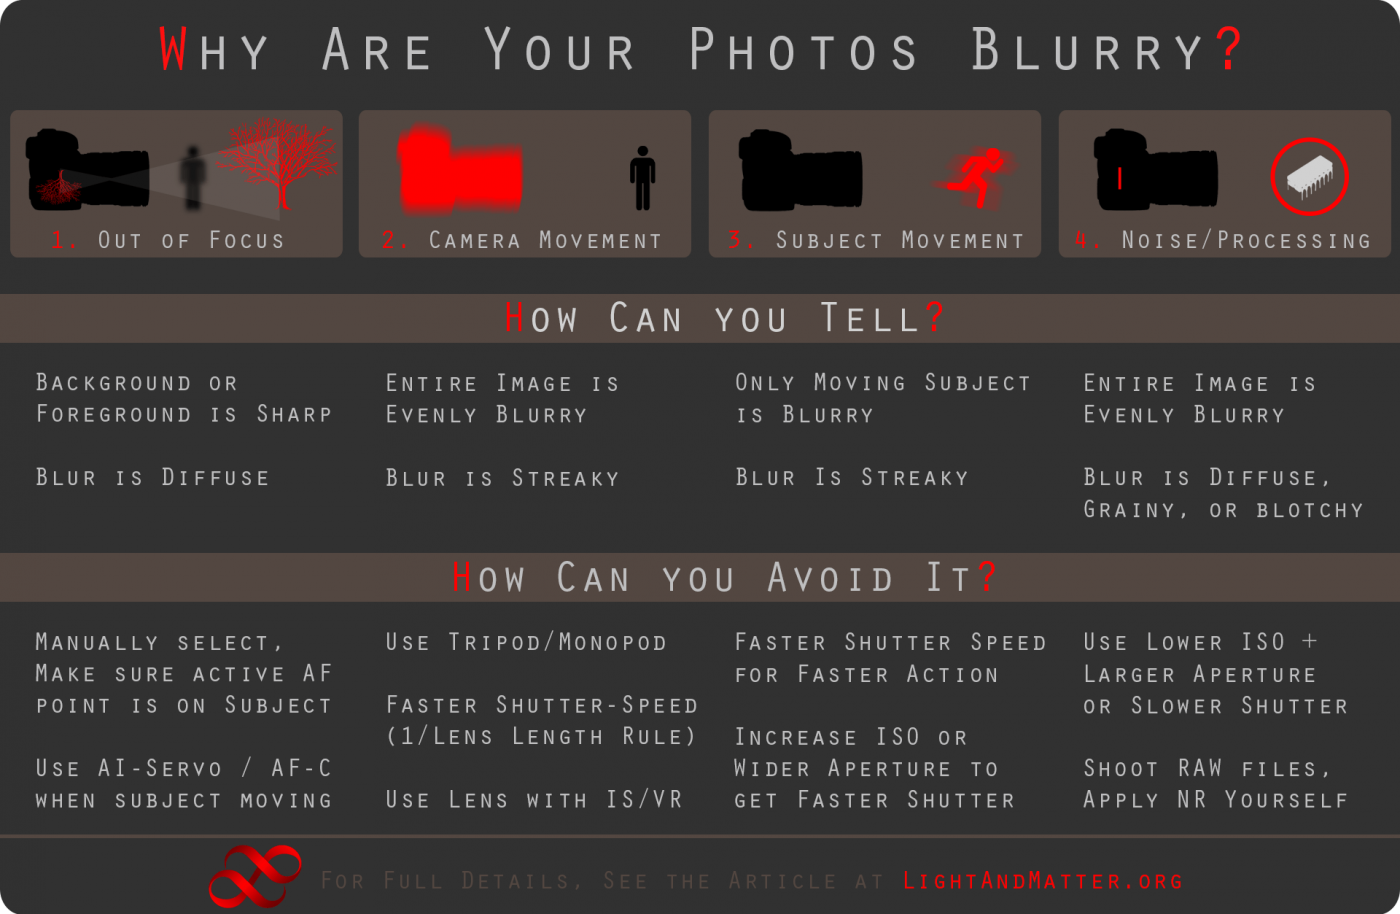
It’s not uncommon for amateur photographers to bring home blurry photos at the end of the day. Unfortunately, though, when many people see a blurry image, they think “It’s out of focus!”, which is only occasionally true. Without knowing exactly why an image isn’t sharp, it’s very difficult to reliably avoid the same problems in the future. Below, I’ve listed the four main causes of blurry photos, how to identify them, and how to avoid them.
1. Out of Focus
OK, lets get this out of the way. Sometimes your camera will focus on the wrong part of the picture: it might focus on the background instead of the subject, it might focus on something in the foreground instead of the background, etc.
How Can You Tell?
Look at the entire image and try to find an area in the background or foreground that is sharp. If you find anything that is sharp, you know that the lens was simply not focused correctly on your subject; it was focused elsewhere.
This problem is most difficult to identify when you’re using a lens with a large aperture and the depth of field is very shallow. For example, if you’re shooting a portrait with an 85mm f/1.4 lens (at f/1.4) and you accidentally focus on the tip of the model’s nose, then the entire face is likely to be out of focus 1 This is assuming that the portrait is a head-shot and the subject’s nose is pointing towards the camera, and therefore, the rest of the face is further away from the camera .
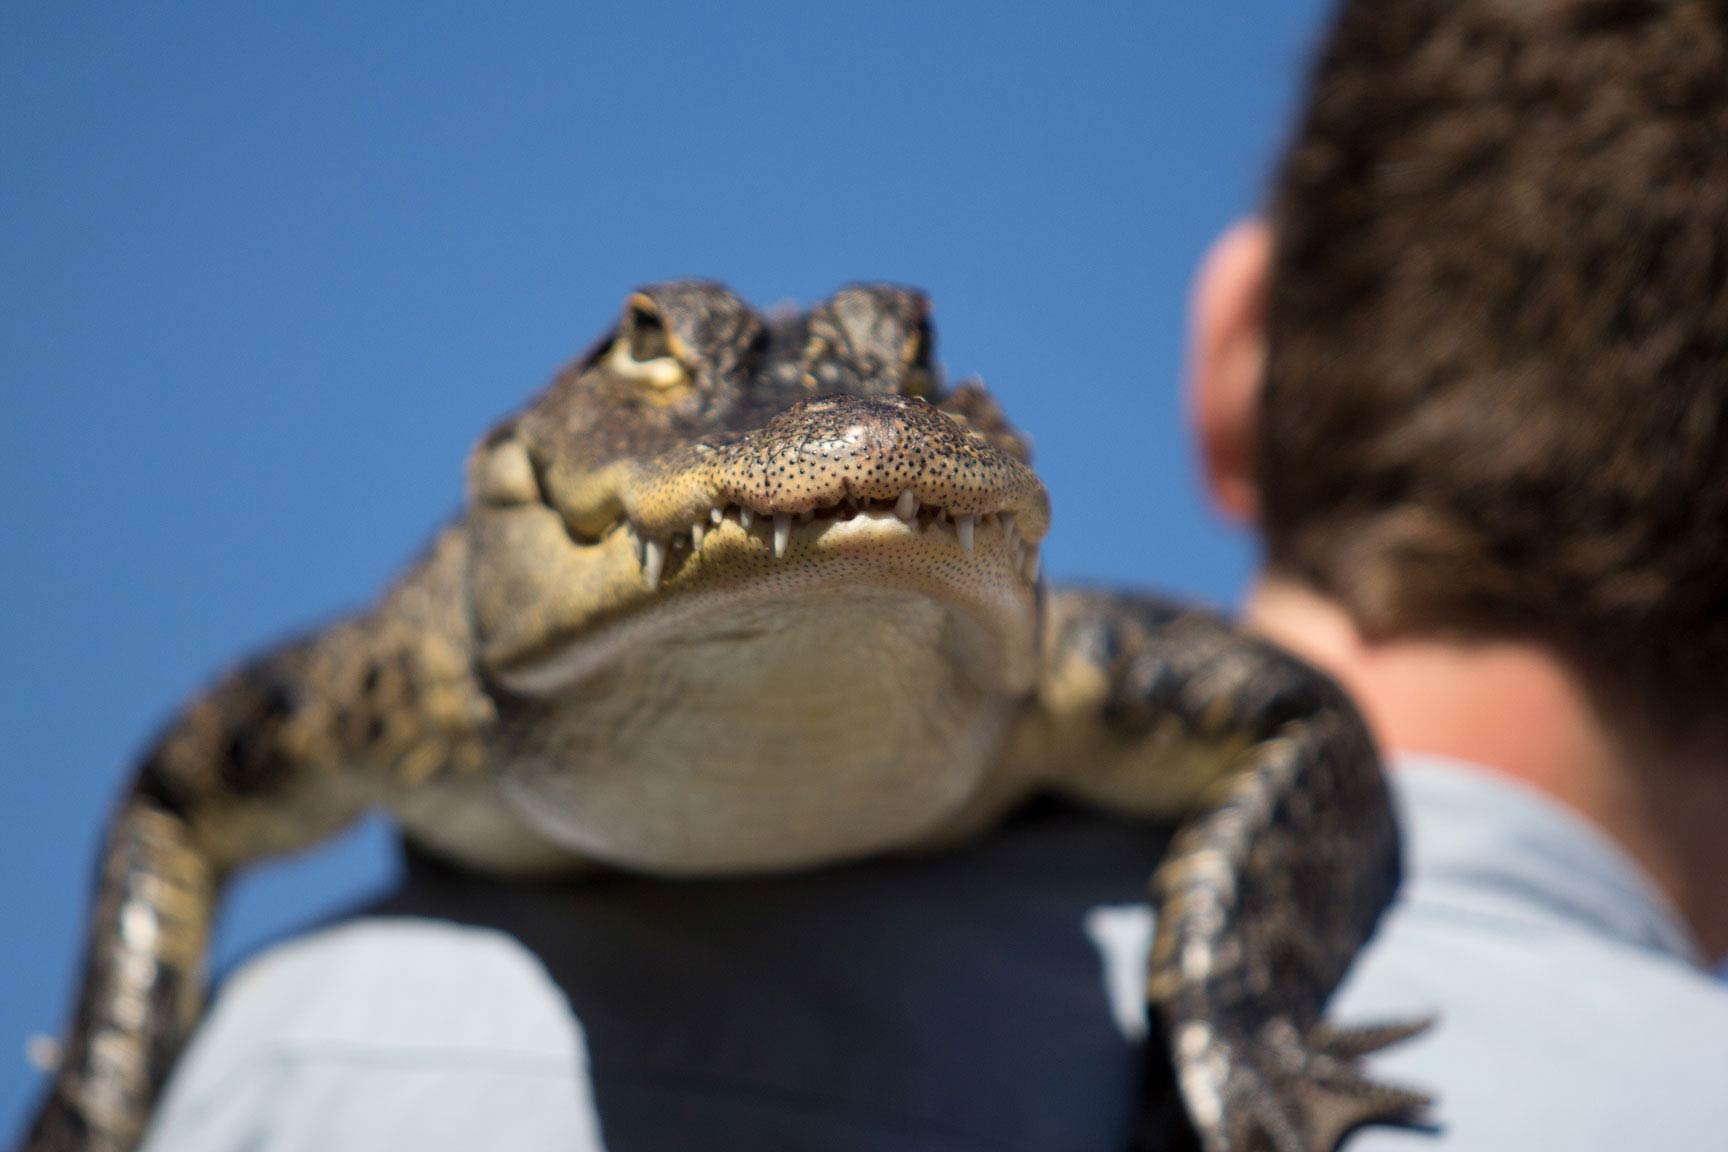
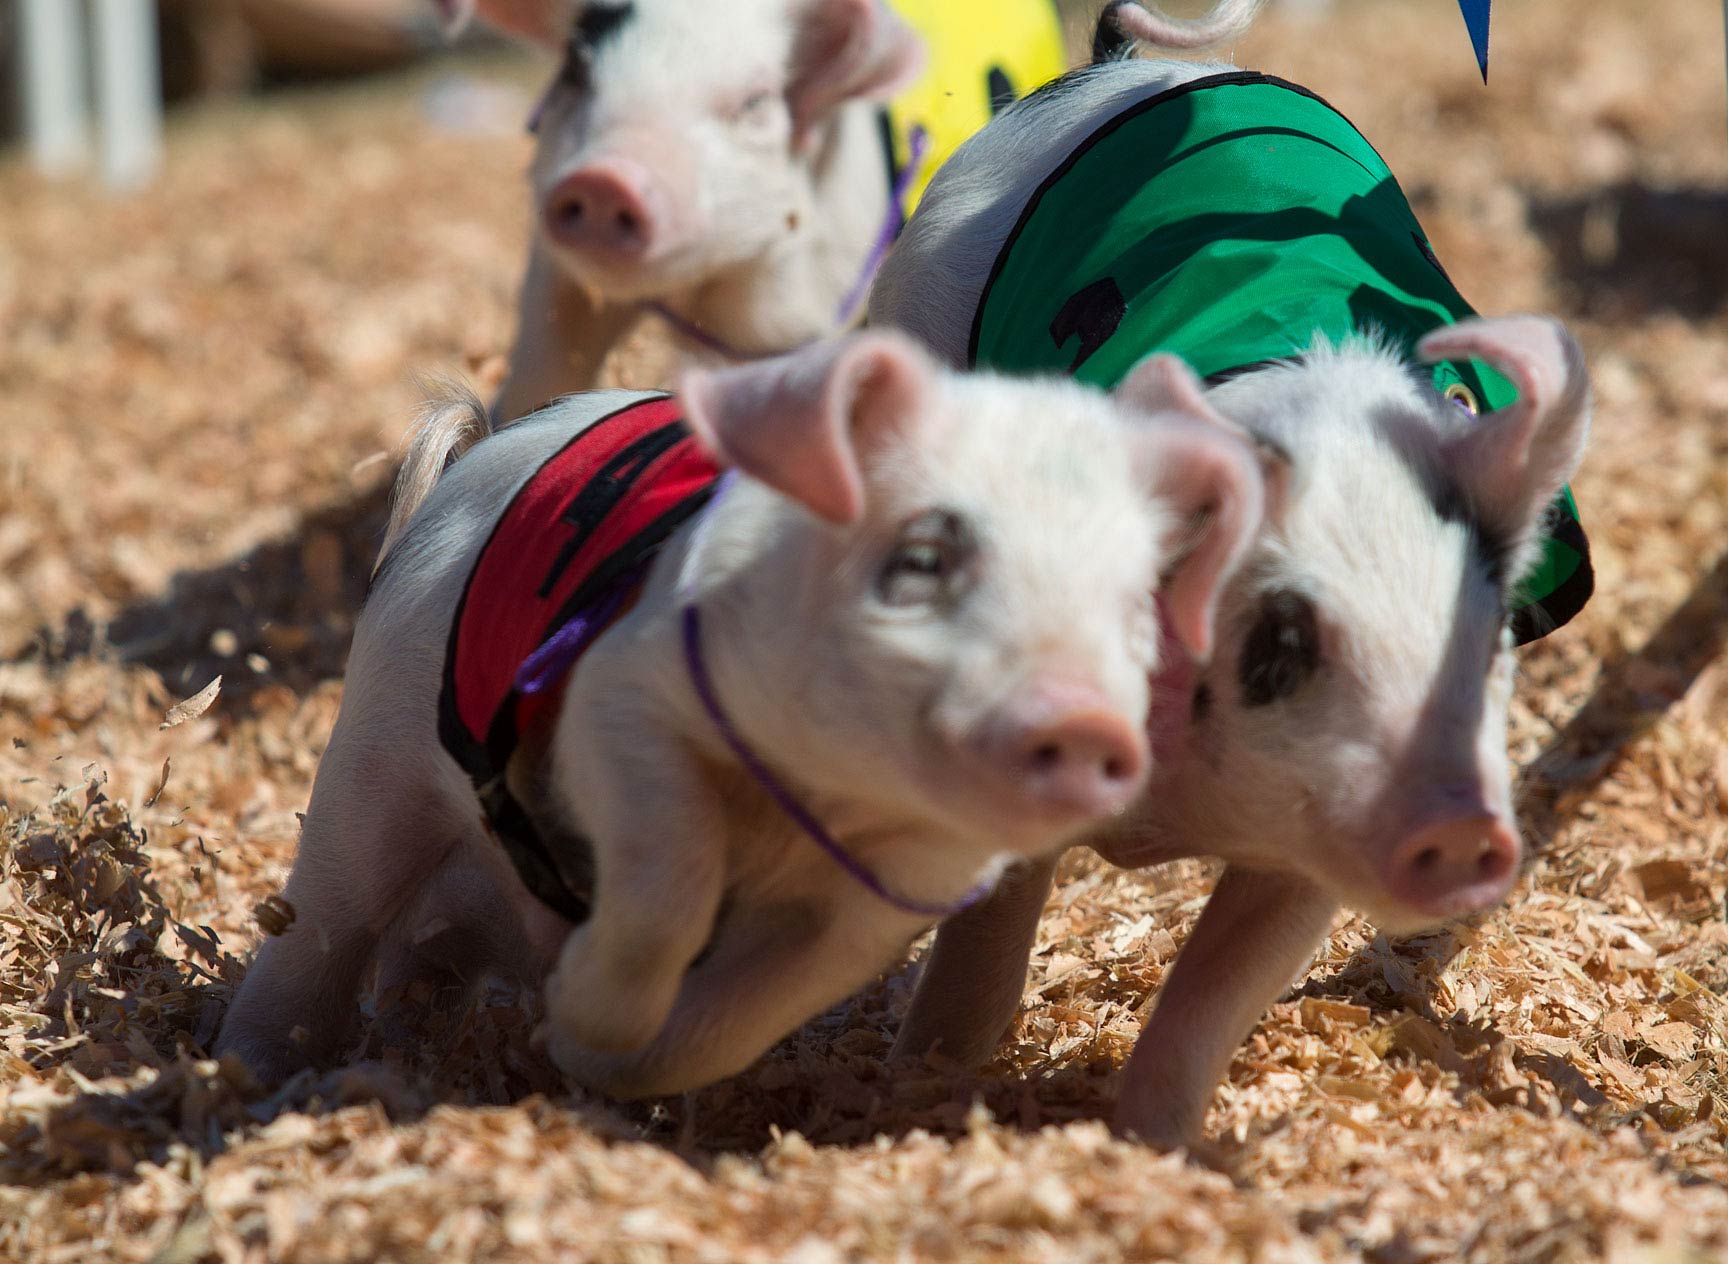
Examples:


How Can You Avoid It?
If you’re using an autofocus [AF] SLR camera, the most important thing to do is practice and get familiar with your camera’s AF sytem. Frequently, this means selecting an autofocus point manually (most cameras have multiple AF points), and making sure that that point remains on your subject, rather than allowing your camera to choose the AF point. It’s also important to understand that autofocus works by focusing on hard edges and details with contrasty lines, so you should try to put your AF point on something in your image that has a hard edge rather than something large and evenly toned (like a smooth wall, the center of a plain t-shirt, etc).
It’s also important to use the appropriate AF mode on your camera for the situation. Most cameras have two modes 2 They also commonly have a 3rd mode that is supposed to switch between the other two automatically, according to the situation. This rarely works well. : one that stops focusing the lens as soon as you press the button and lock focus (on Canon cameras, this is called “One Shot”, on Nikon, “AF-S”), and one that continues focusing and re-focusing on the subject for as long as you hold the focus button down, and even after you start taking pictures (on Canon this is called “AI Servo”, on Nikon, “AF-C”).
So, if you’re taking a burst of 3 pictures of a person walking towards you, and you use “One Shot”, the camera will focus for the first shot, but by the time you’ve taken the 3rd shot, the lens will still be focused in the same place, but the person will be closer, and therefore out of focus. If you use AF-C / AI Servo, however, the camera will continue to focus between shots (in fact, if the person is moving at a constant speed, it will predict where to focus), so all three will be in focus.
On the other hand, if you’re taking pictures of someone who is relatively stationary on the other side of a crowded room, and you use AI Servo / AF-C, there’s a good chance that once you’ve achieved focus, other people walking across the frame will cause the camera to re-focus, and your intended subject will be out of focus. If you’re shooting with “AF-S” / “One Shot”, though, once you have focused on your subject, they will remain in focus no matter what else happens in your frame, as long as the subject doesn’t move.
Finally, it’s important to remember that the larger the aperture (ie, smaller f-stop number) you use, the shallower the focus in your image will be. Consequently, if you shoot at f/1.4 or f/1.8, or even f/2.8 with a telephoto lens, the plane of focus may be so shallow that only a small part of your subject will be in focus (eg, the eyes but not the nose). Using a smaller aperture, like f/8, will reduce that problem.
NEXT PAGE