Photo Composition: The Rule of Thirds

Composition Basics : The Rule of Thirds

More than anything else, composition is what separates the snap-shooter from the photographer. With a little practice, virtually anyone can master exposure and lighting theory, but photographers spend their entire careers trying to improve their composition and style. No matter how many thousands you spend on a camera, it won’t improve your composition.

Photographic composition is like playing chess or a musical instrument: very few of us will ever be a Bobby Fischer, an Itzhak Perlman, or a Jimi Hendrix, but no matter what your natural talents are, careful study and lots of practice can take you very close. And more importantly, learning a few basics can very quickly take you beyond your current level and beyond the masses of snap-shooters.

In large part, that is why I decided to start a series of articles on composition.  As some of you know, however, I also spent several years as a teacher, and I quickly discovered that the best way to learn something is to teach it. So, I also hope that this endeavor will help me examine my own current skills and improve my own work.

It’s a huge subject, so each individual article will cover just a single, easy to digest aspect. The so called “Rule of Thirds” seems like the most obvious place to begin, and I have several other topics in mind, but for those of you who are professionals or advanced amateurs, I’d like to hear your suggestions for further topics as well. Just send me a message here on the site, or an email.

The Rule of Thirds

Rule of Thirds, 4 intersections
The yellow circles mark the ideal placement for subjects, according to the Rule of Thirds.

Like all rules in art, the Rule of Thirds was made to be broken, but it should not be ignored.

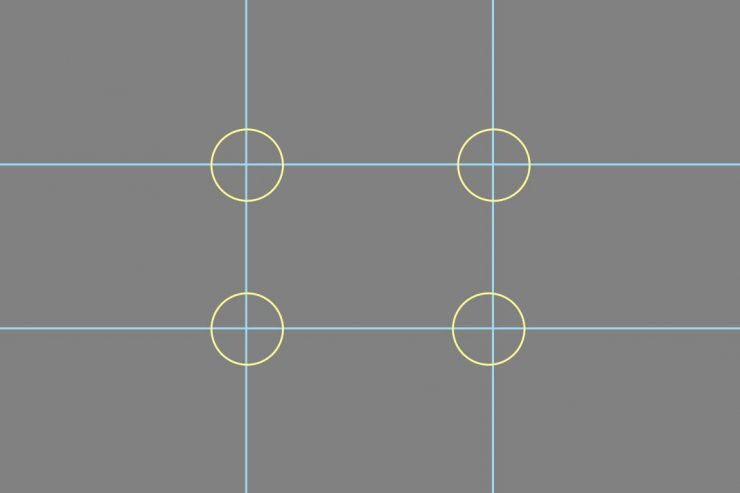
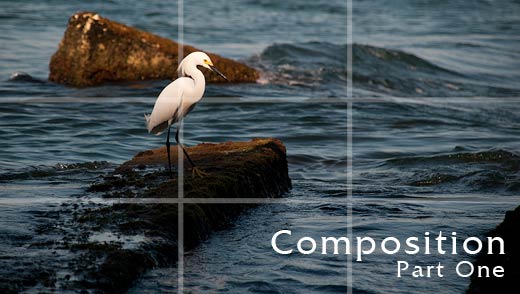
To use this rule, start by imagining the scene in your viewfinder broken into thirds, vertically and horizontally. These imaginary lines will create a grid with four points of intersection, as you see to the right. The Rule of Thirds states that the main point of interest in your photograph should be placed at (or near) one of those four points .

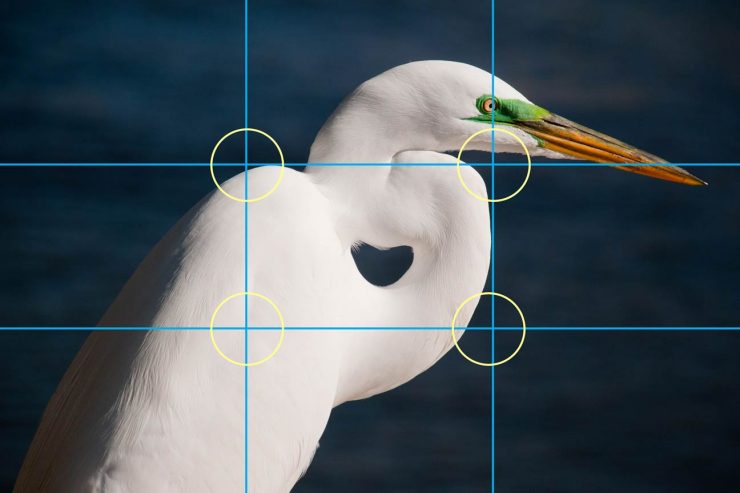
Throw out conventional wisdom that your subject should be centered. If you’re taking an environmental portrait, place the subject’s face in one of the top two points. If you’re taking a tighter portrait, the eyes (or near-eye) should be there. If you’re shooting a landscape, place the most important detail at one of these points.

rule of thirds egret
Here I placed the eye on the right third, but not quite on the intersection because of other considerations.

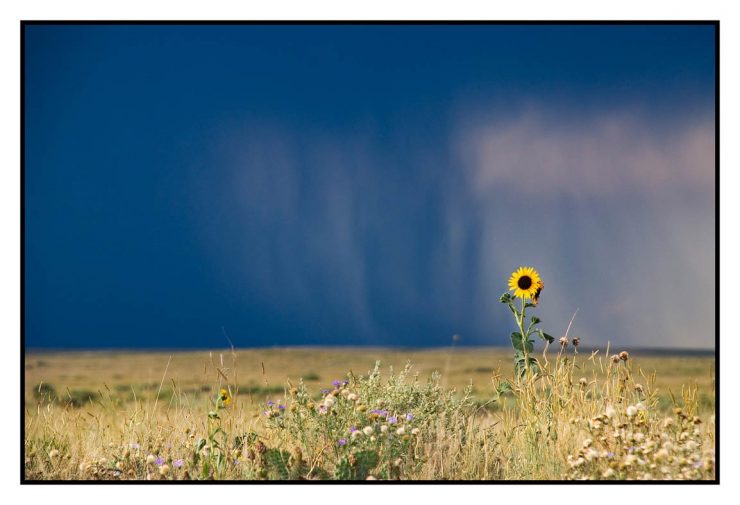
Similarly, the Rule of Thirds states that the horizon should be framed at one of the thirds, not in the center of the frame. This is one of the most prominent differences between the photos of a beginner and a more advanced photographer: snapshots very commonly feature a horizon line in the center of the frame.

rule of thirds example
Here, the horizon was placed along the higher third, and the bison is on the top-left intersection.

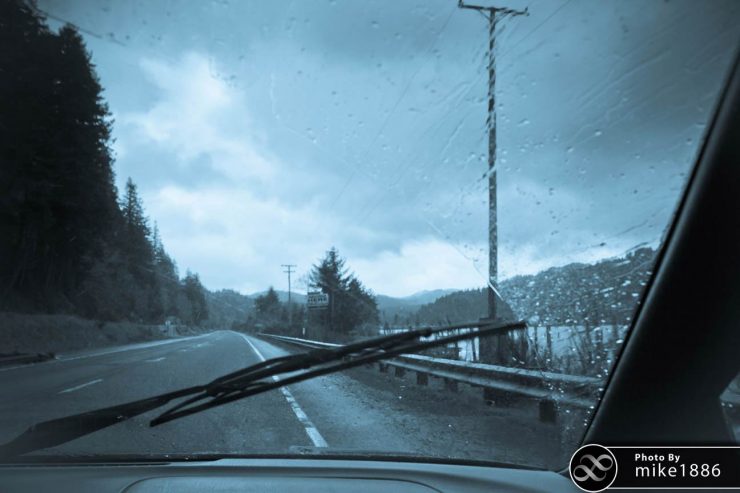
The same general rule can be applied for other important design elements. If you have a tree, building, wall edge, doorway, etc, that makes a strong line across the frame, it can frequently be helpful to frame it on one of the third lines as well.

The tree highlighted by the sun here is just slightly off of the left, vertical 1/3rd line.
Here, the face is placed at the upper-right third.

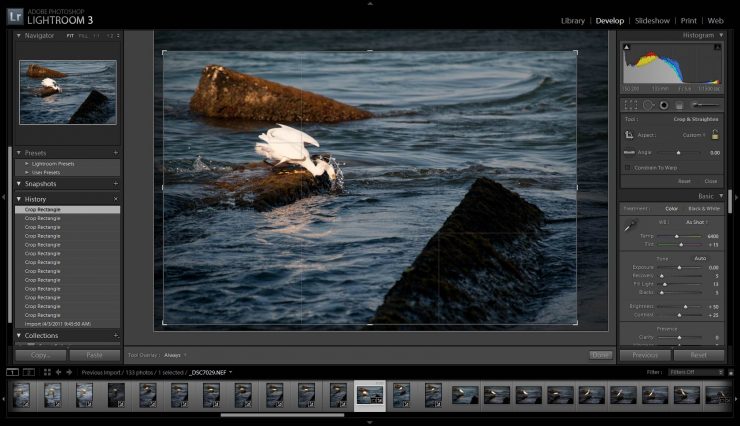
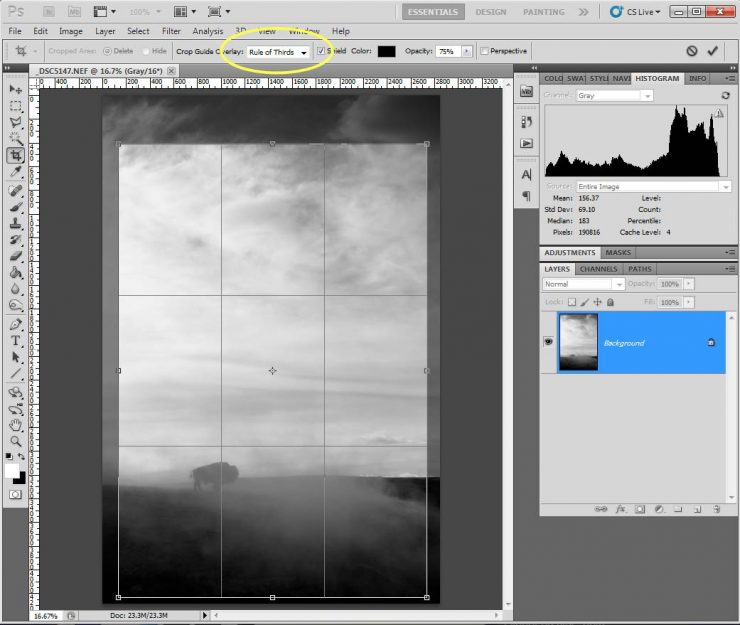
Although it is usually best (in terms of image quality) to compose your image while shooting, the Rule of Thirds can also be applied in post-processing to improve images that you’ve already shot. Photoshop and Lightroom both have grid overlays built-in to their “Crop Tools” to help you identify the divisions described above. In both programs, the “Rule of Thirds” settings are the default, but other options are available.

Lightroom Rule Of Thirds Crop Overlay
Lightroom’s “Rule of Thirds” overlay is visible here, as I crop some empty space.
Photoshop Rule of Thirds Grid Overlay
In Photoshop, the Rule of Thirds grid is a little easier to see.

Have A Photo That’s an Example of this Rule?

Rather than spending the day searching through my archives for more examples, I thought I’d open this series to submissions. Your photo doesn’t need to be technically or artistically perfect, it just needs to be a good example of this rule. Email me a few of your favorites photos for the topic, and I’ll add them to the gallery at the end of the post, re-sized if they’re too large, and with your byline added.

Editor-in-Chief
Subscribe
Notify of
guest

22 Comments
Inline Feedbacks
View all comments
James

Hello, I have just joined this community and when I was reading these ‘tutorials/lessons’ I thought I might add a few photos of mine as examples but if you think it is unnecessary feel free to delete them. ;)
I am thinking of buying my first DSLR ( Canon 60D ) and I was trying to learn everything about DSLR photography. That’s when I found this website and glad I did. Very helpful and nice!

An example for the Rule of Thirds

Another example of the Rule of Thirds.

An example of the Rule of Thirds

My example of the Rule of the Thirds.

© James (cmcvs)


James

Finally I uploaded my photos to this site and now adding images works ;)

These are my examples of the Rule of the Thirds. Let me know what you think of them.

© James (cmcvs)

Dan

Just stumbled on your site while deciding between a 60D/T3i and determining which lens(es) to buy. I like this article a lot. I am by no means a great photographer, but I’ve always felt that off center looked better, and here are some words to explain why. Thanks and keep up the great work

Mike Scott

Thanks for the article, Matt!

Just thought I’d share why I the two Rule of Thirds example pictures that I sent you were the ones that came to my mind when you opened up the gallery for example submissions.

Picture 1 (the fisherman standing on the rocks) may seem like an odd choice since it commits the cardinal sin of putting the horizon in the middle. Actually, I first tried putting the horizon on the bottom third line, and then tried putting it on the top third line. In the end, though, I ended up liking it best in the middle. And for me, this photo is an example of how you can still get use out of the RoT even if you depart from it in one particular respect, because even though the horizon is in the middle, I put the line of sharp contrasty rocks where the fisherman is standing (which, to me, is a more interesting line than the horizon line in this picture) on the bottom third line, stuck the fisherman himself on the right vertical third line, and had his feet and upper-body/head pretty close to the bottom-right and top-right third intersections.

Picture 2 (looking out the rainy car windshield) is a little more conventional, with the horizon around the bottom third. But more importantly than the horizon in this picture, for me, is where the strongest lines are pointing. All the lines on the road, the guardrail and even the telephone lines that start in the top right, are all converging on the bottom-left thirds intersection, which is where my eye goes first when I look at it. But the other thing of interest to me in the picture is the windshield wiper, and when the eye follows that line it goes up to the bottom-right thirds intersection (where it is met by the curve of the raindrops, the far shore of the river, and the line of the telephone pole that sits on the right vertical third line). I think this picture is probably a bit too busy and cluttered for some people’s tastes (especially when you look at it side by side with the simple fisherman shot). But you said that the examples didn’t need to be masterpieces, and even if one thinks that Picture 2 is too cluttered, the clutter is very much Rule of Thirds Clutter! :)

Craig Volpe

Hey that’s not Dexter Reservoir or Lookout Point Lake is it?

Mike Scott

Craig: No, not Dexter or Lookout Point. It is in Lane County, though, just over closer to the coast — near Florence. Are you an Oregonian?

Craig Volpe

Yep. From Eugene! Oregon sure does have some pretty highways :)

Craig Volpe

I think whenever the rule of thirds is brought up it’s important to discuss that there are times when it’s good to break it. Maybe you could elaborate on when it is appropriate?

I’ve noticed when there’s a lot of negative space around a subject or when there is some mirroring going on around the subject those are often good times to break the rule of thirds and put your subject dead center.

Also maybe this applies more to people that view a lot of photographs, but sometimes I feel like compositions with the rule of thirds are boring or cliche. Because the rule of thirds says you’re supposed to put your subject on those spots I think it can sometimes add tension or interest to a photo if you don’t follow the rule of thirds.

Craig Volpe

Ah that’s the word I was thinking of, symmetry! Looking forward to those articles :)

catzcradle

Great article. I think I found your website due to your 60D vs 600D article that I was searching for info on. Been a great place filled with good information for someone trying to take their skillset further.

Chris Gampat

Hi Matt,

Great posting and introduction to the series. What I hope you do cover is how you can save your images in post-production with cropping your images.

I know many photographers that use the center focus point of their 5D Mk IIs or medium format cameras and then recompose; but there are also those that center the image and then crop liberally in post. That was just something that came to mind when reading this.

Thanks again for the great post though.

Chris Gampat
Editor in Chief
The Phoblographer

Chris Gampat

Hey Matt,

Thanks for the response. But if you’re shooting with a high MP count camera, you’re not losing a tremendous amount of quality, no? 18MP and 21MP allow for generous cropping.

Also, we miss you at BHInsights.

-Chris Gampat
Editor in Chief
The Phoblographer

Chris Gampat

Looking forward to the rest of the series then Matt!

Granted, I don’t make prints anymore. All my work is spread across the interwebs. :)

Craig Volpe

This makes sense in theory, but in practice it’s not true at all. For one thing, when you crop you gain depth of field. If you value shallow depth of field in your photos, then cropping more than a little bit makes them look worse than if you had cropped in camera.

Karen C

I have a 60D, so not the same format as a Mark II, but… Am I wrong in thinking that you want to get the composition right when taking the shot? I never crop in post-processing. This leaves me wondering, however – am I a purist? Or can I bend a bit and crop in PPing and take an ok image into something much better… And, if I do, can I retain enough quality to allow any future clients (or myself when doing shots of my kids) print in large format?

On to the next section of the article… Love the rule of thirds, btw, and typically try to adhere to it.

Karen C

Excellent, thanks!