OK, this is something a little different than usual. I was looking through my collection of unpublished post drafts today and ran across this one; it’s an article that I started over two years ago. Unfortunately, the dolly turned out to be impractical to use, so I didn’t think that it was worth finishing the post at the time, but now I’ve changed my mind and decided that some of it may be useful or interesting to others who are working on the same sort of thing. I’ve settled on a new, more easily transportable design instead, and I have produced a video about that one, here. -JMG
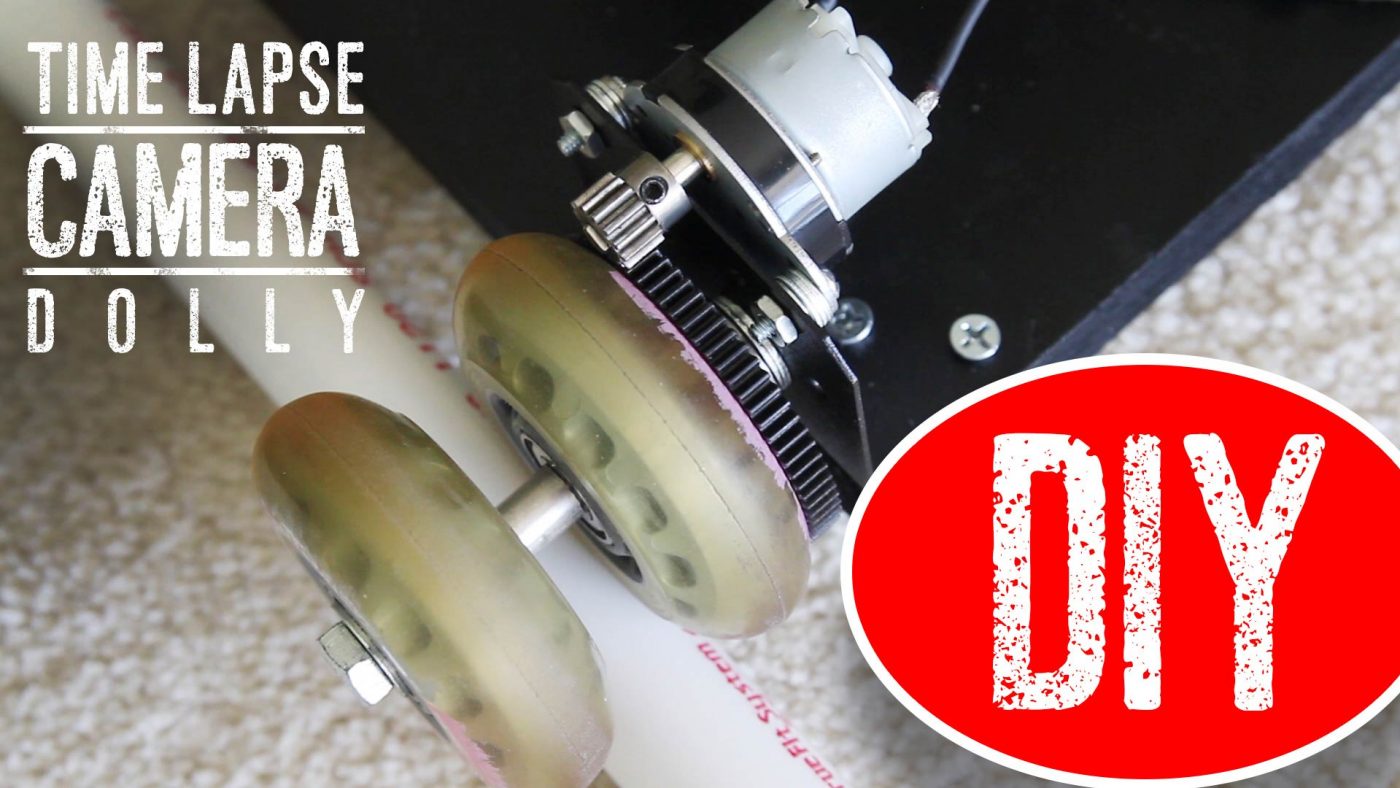
Time-Lapse Dolly with USB or Analog Speed Control
Several months ago, I decided that I wanted to try my hand at time-lapse photography. So, I bought an inexpensive intervalometer (timer-release), and set about building a dolly system. I knew that the design could be pretty simple and the parts involved could be inexpensive, so I decided to try to do it for under $50.
Standard movie dollies are very simple devices, consisting of a cart to hold a camera or tripod and a set of rails for the cart to move on. This produces smooth, even motion as the camera moves to a new position. Generally, the dolly-cart is pushed along the track by hand for live video/film. But that presents a problem for time lapse photography, where the camera position may only move a foot or so over the course of an hour: there’s simply no practical way to move a dolly smoothly by hand over such small distances… especially if you don’t want to attend your camera for several hours at a time. So motorization seemed important.
The real trick would be getting a small motor geared down to the point that it would be powerful enough to move the dolly and, more importantly, move it at a very slow rate. I ended up locating some inexpensive gear-motors that were already reduced to 10 rpms or less, and with that in mind, I decided on a design for the dolly. For several reasons (perhaps simplicity being the most important), I went with a direct-drive system, in which the motor drives a wheel on the dolly which then rolls the cart down the track. This way, I could use tracks of any suitable material and of any length, and I could purchase them on-location if I were traveling, without having to make any major modifications.
For testing purposes, I went with 3/4″ PVC pipe. These cost about $1.97 for 10 feet (3+ meters) at my local Home Depot, which could be cut in half for a 5 foot track, but I bought two, in case I wanted to start with longer tracks.
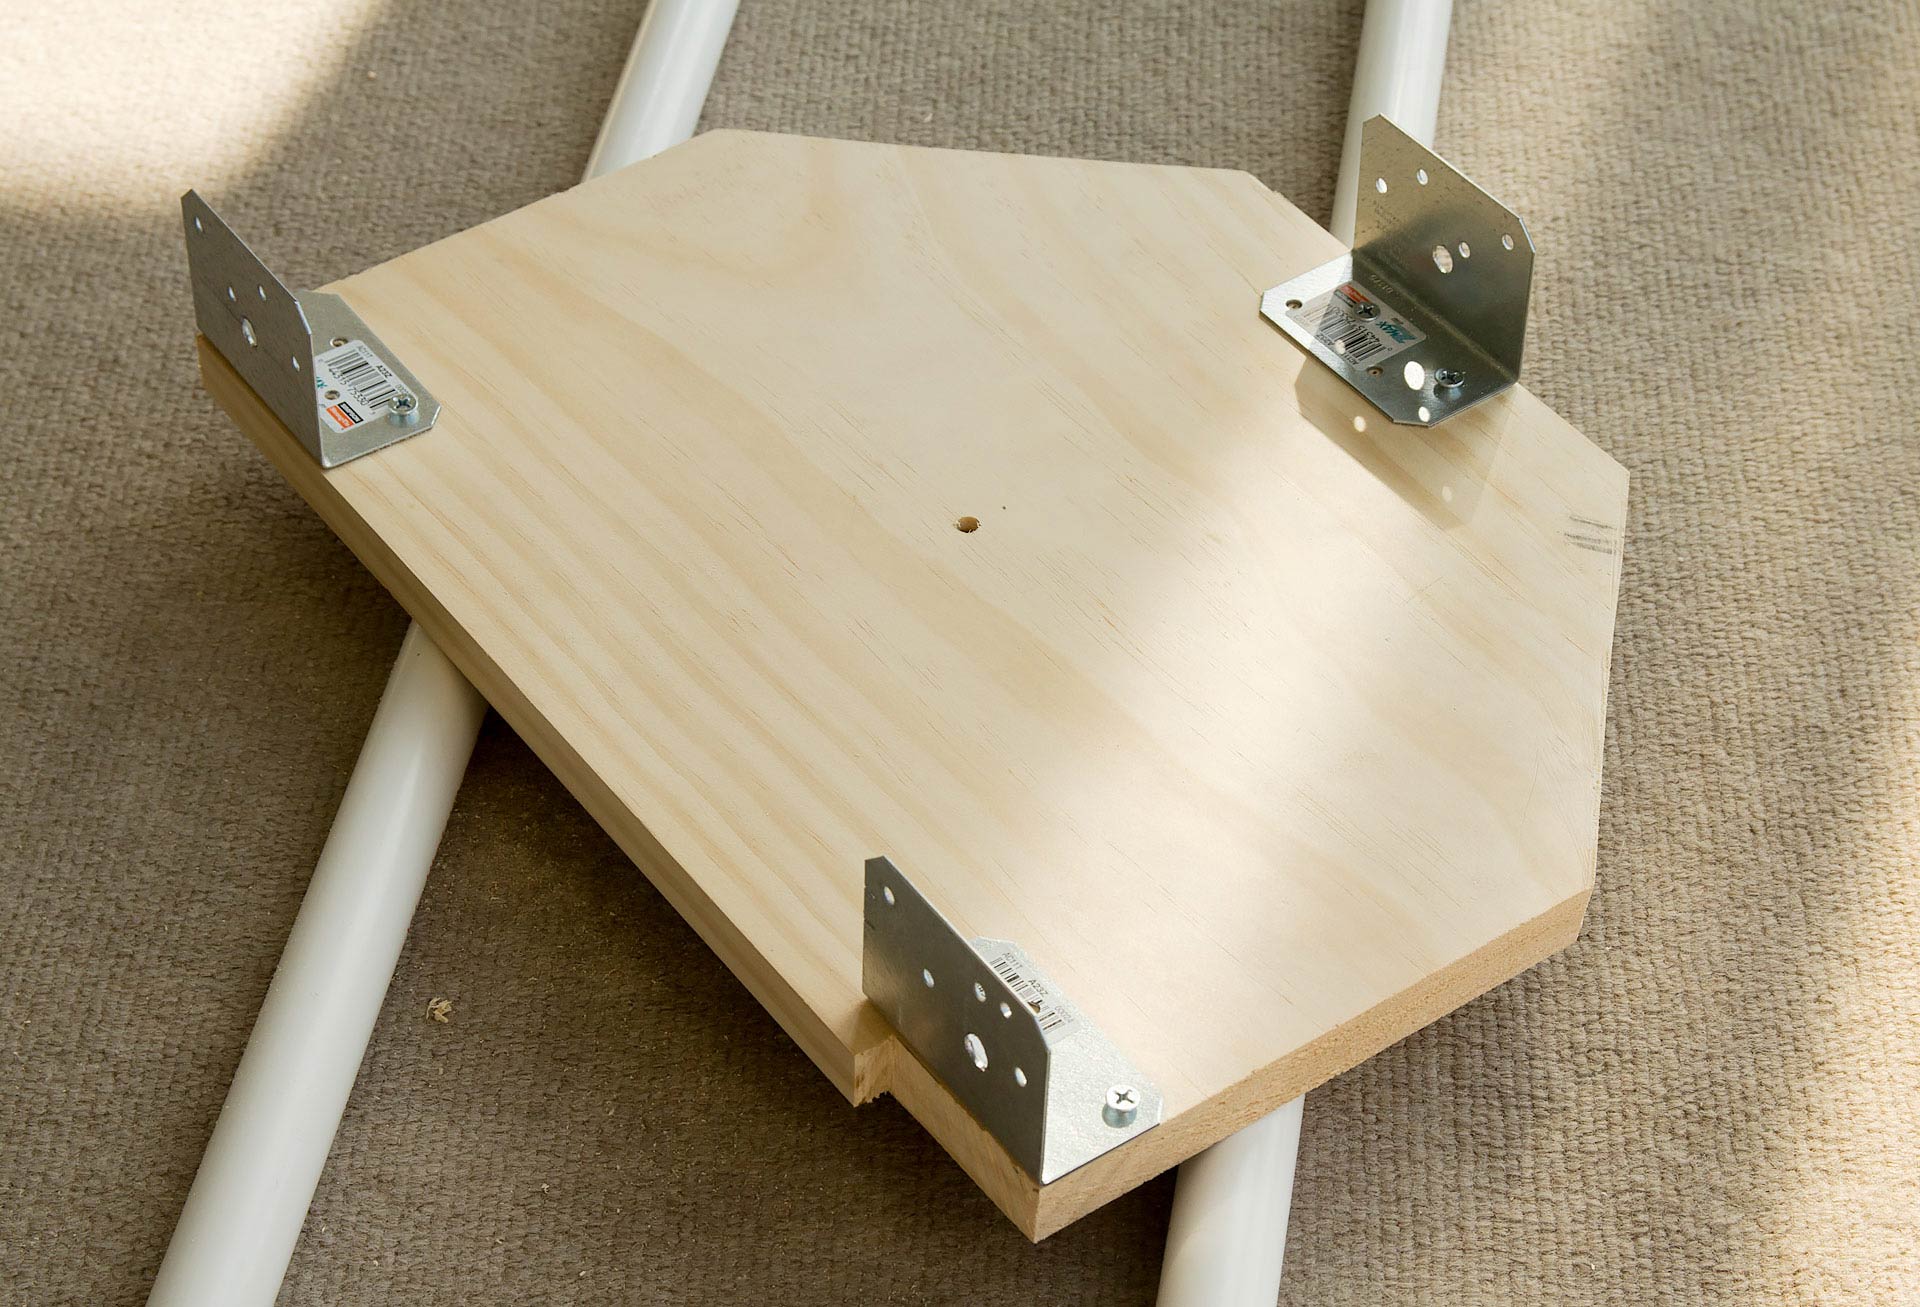
For the cart, I used a piece of pine wood, but just about anything would work, as long as it’s large enough to keep your camera stable. You can use scrap plywood (3/4″ thick), hard or softwood, aluminum or steel, carbon-fiber… whatever you want, as long as you can mount the wheel brackets on it and it’s larger than about 1 foot x 1 foot. For stability, I mounted 3 sets of wheels rather than four (to avoid the wobbly-table syndrome if my rails are not completely level). The wheel design is based on one I saw in the book “Killer Camera Rigs You Can Build“, made of pairs of inline-skate wheels.
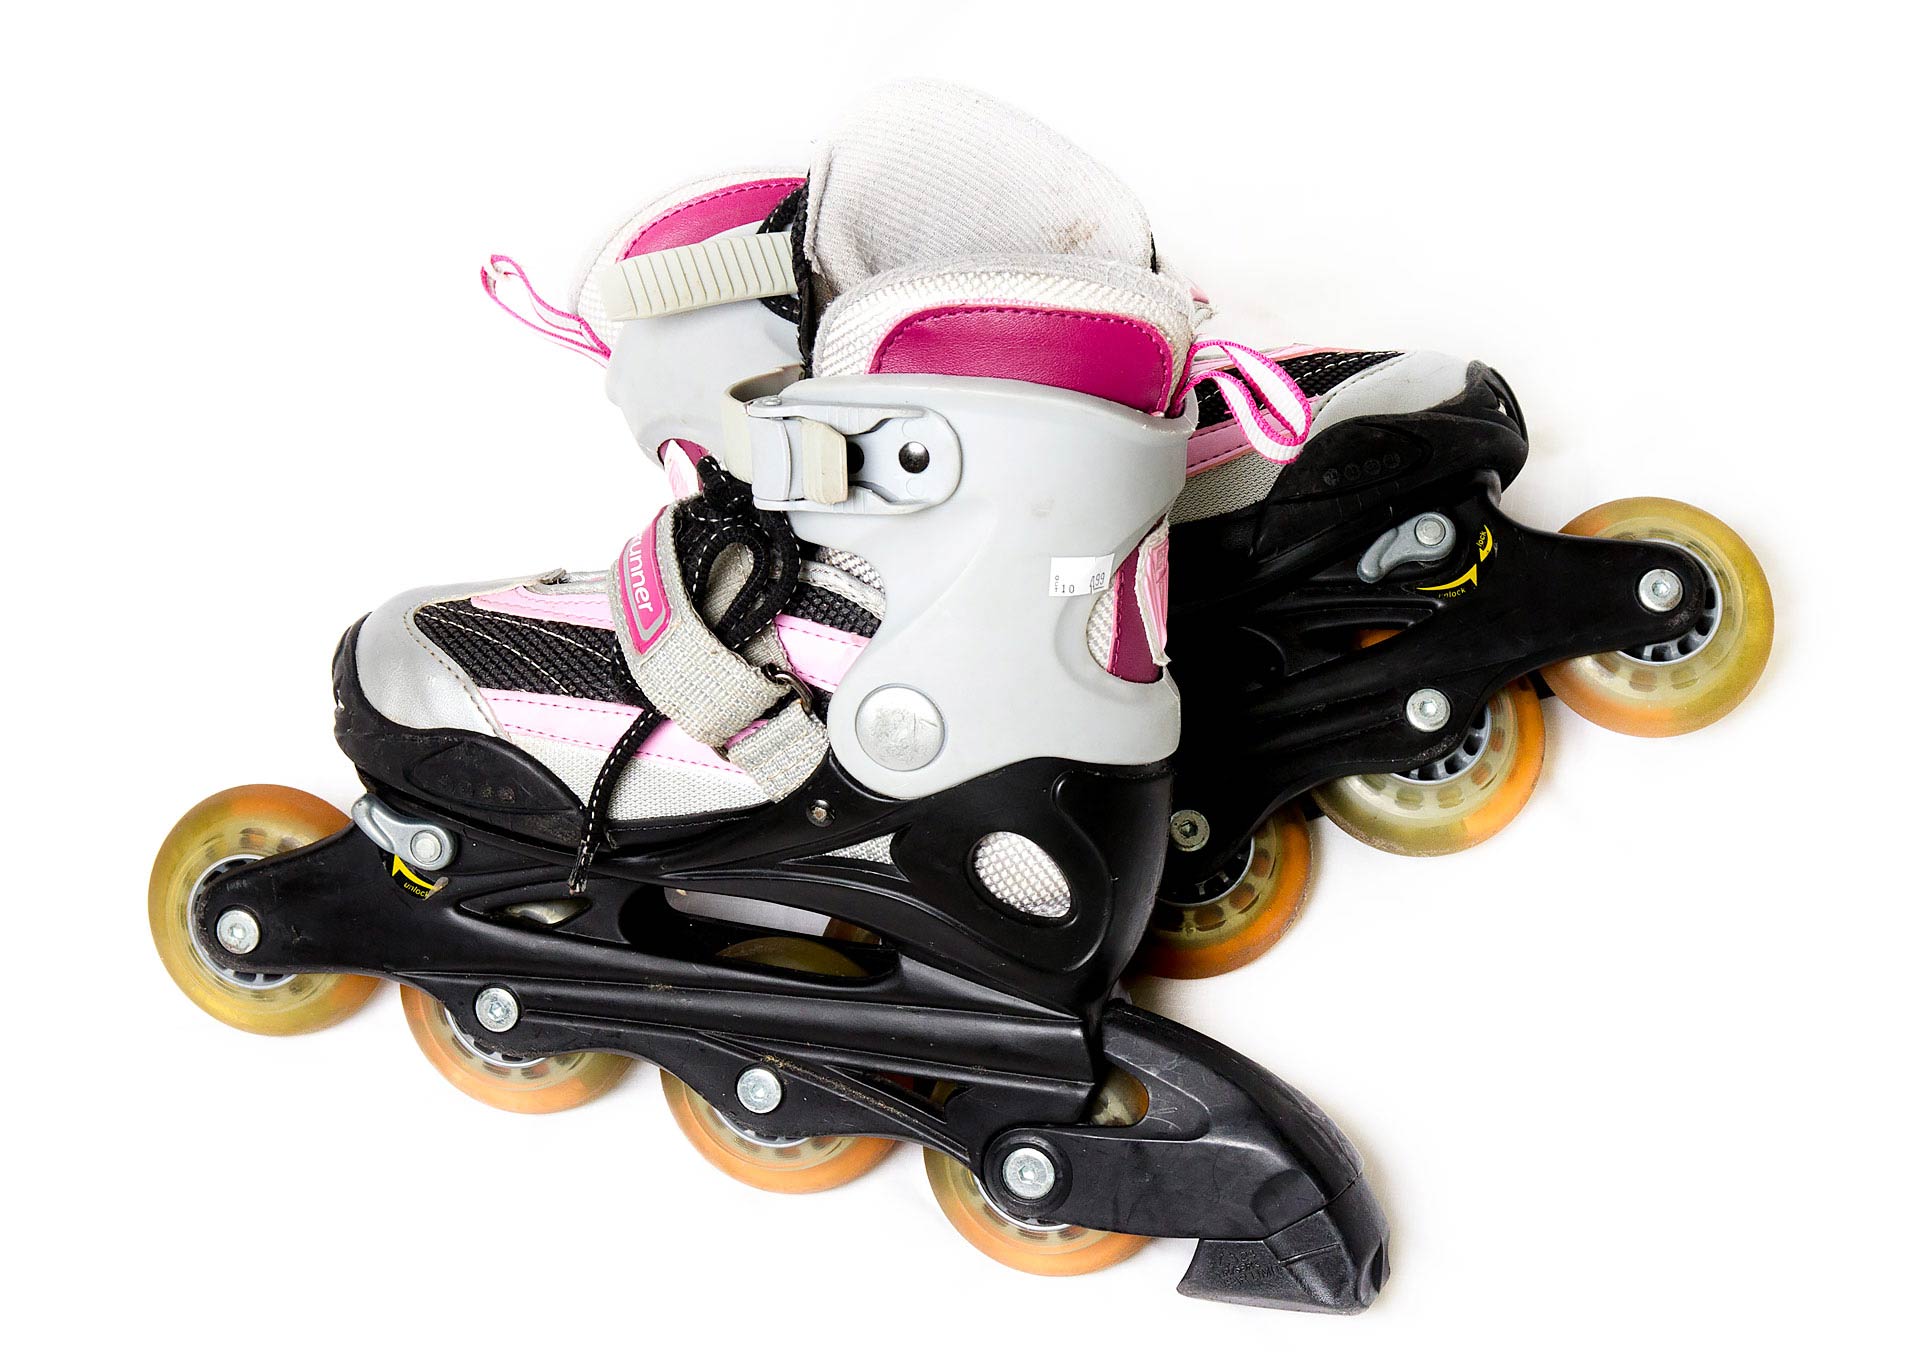
The skate wheels and bearings can be purchased new, of course. I’ve seen sets for at little as $17, including bearings and shipping. But I didn’t want to wait for mail order, and local prices were much higher than that. So instead, I went to a thrift shop up the street (being in Florida, there’s a Goodwill every corner). There were about a dozen pairs to choose from, but I discovered that the children’s skates used the same size wheels (76mm diameter) and bearings, but had much lighter use. One little girls’ pair had clearly not enjoyed much use and cost $4.99. I payed, removed the wheels, and discarded the rest.
With the addition of a few spacers, the wheels mounted easily with some 5/16″ bolts and 3 Strong-Tie building brackets. Quick and easy. I drilled a hole for a 1/4″ bolt in the center of my cart platform, and mounted a tripod ball-head for the camera. If I had simply been making a standard motion video, that would have completed the project.
But this is where things actually start getting fun.
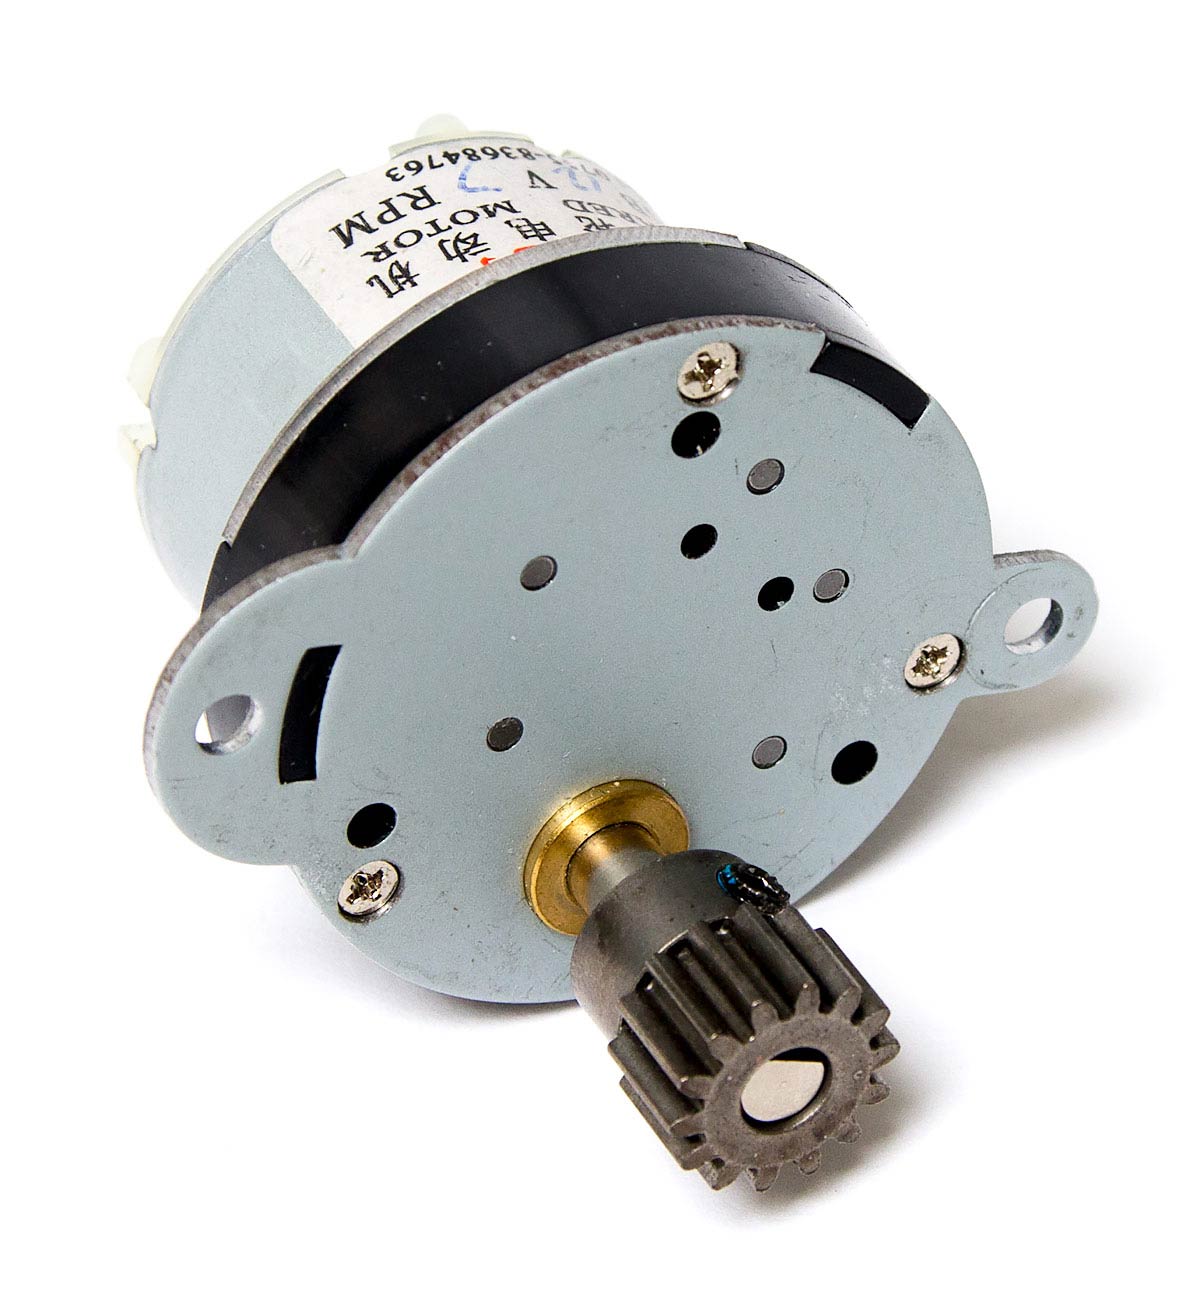
I ordered two of the geared motors that I mentioned previously, one geared down 7rpm @12v, and one 2rpm @ 12v. Both can be purchased directly from China, though I went with an American distributor (on Ebay) to cut down on shipping time. $16 each, including shipping. I wasn’t sure which would give me the right speed range.
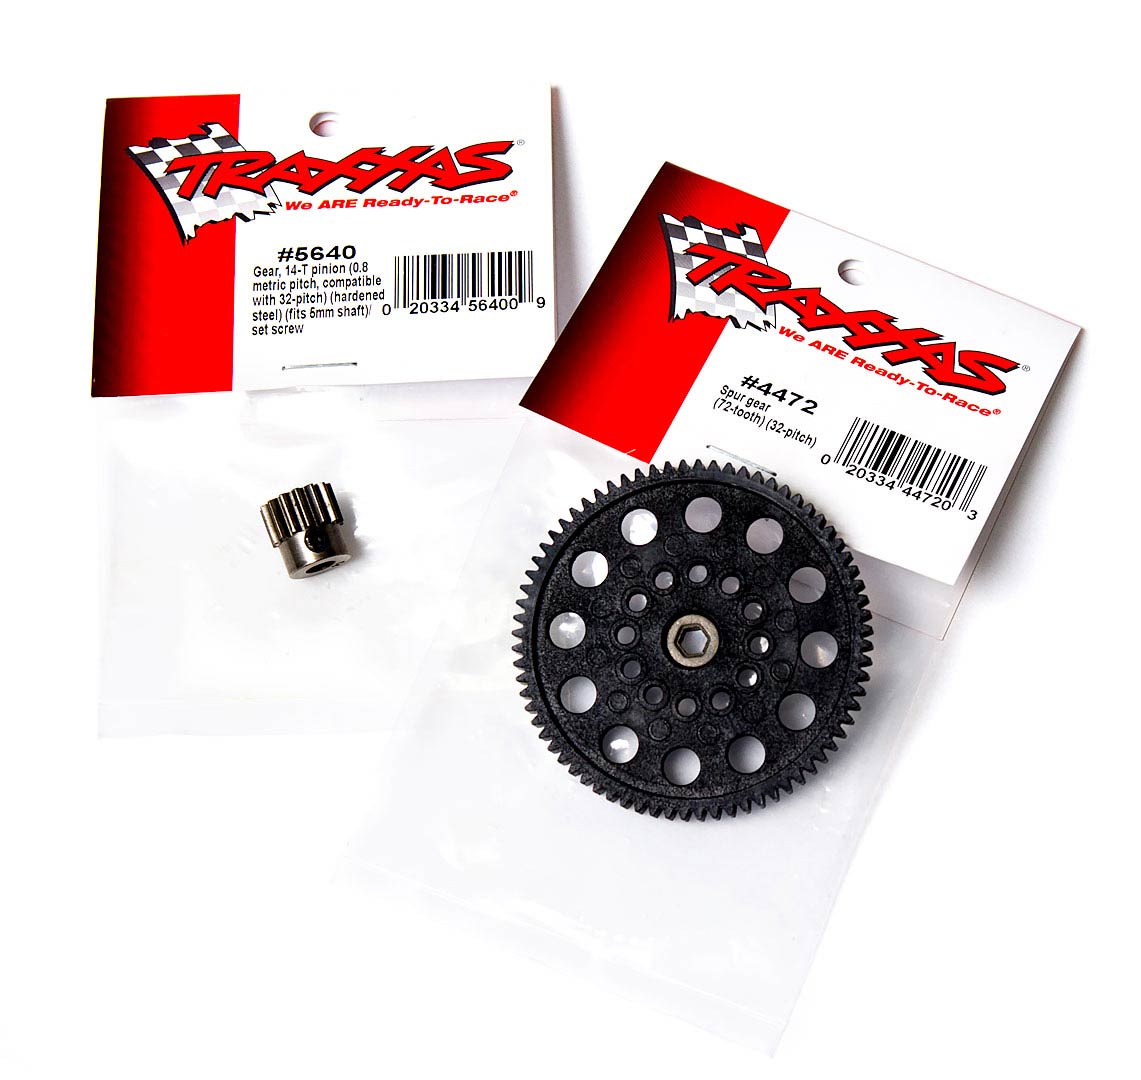
I then purchased a pinion gear for the motor shaft, and a larger gear for the wheel shaft. It took me a while to figure out where to buy these, but finally found a Hobby/RC/Robotics shop that carried them. I mounted the motor to one of the wheel brackets in such a way that I could easily swing the motor away from the wheel gear while setting up my shots. The smaller gear was a 14 tooth, the larger a 72 (with the same tooth pitch) which gives me an additional gear-down ratio of about 5:1 (ie, for every five rotations of the motor shaft, the wheel shaft will rotate once). A little testing showed that when powered by 6 NiMH AA batteries, the 7rpm motor actually turned at about 4 rpm. The circumference of the 76mm skate wheels is [2(pi) * r] or 239mm, or about 9.4 inches. This means that every time the motor shaft revolves once, the cart will move forward about 9 inches (a little less, since the rail is not actually in contact with the largest part of the wheel).
Given these facts, it became obvious that with the 7rpm motor, the dolly would travel at over 6 inches per minute, far too fast for a long, multi-hour time lapse sequence, but maybe suitable for shorter ones. With the 2 rpm motor, I’d be getting something closer to 1 inch per minute (5 feet per hour), which is still too fast for a long time lapse.
Rather than continuing to gear down the motors, I decided that I was at a good place in the design to start considering electronic controls. After considering a few options, I decided to use a motor controller, which would retain much of the motor’s power, but would allow me to dramatically reduce its speed. I wired in a Pololu Simple Motor Controller. I considered using an Arduino, but liked the simplicity of the Pololu.
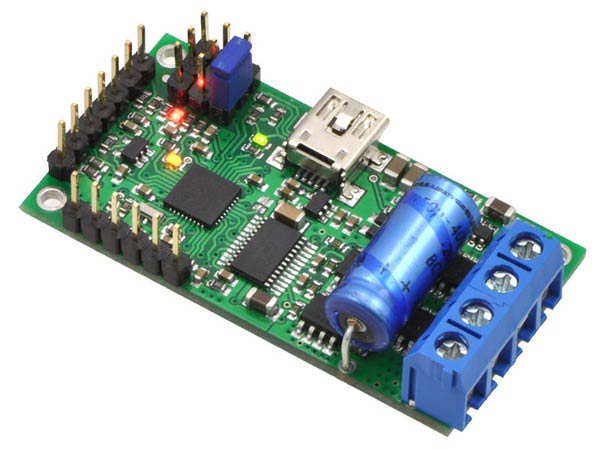
If using a motor controller sounds daunting… don’t worry, it’s very simple. There are two wires to connect to the battery pack, two wires to connect to a motor, and that’s enough to make it work via USB. If you want separate analog controls as I did, it was a simple matter of attaching 3 more wires to a potentiometer or joystick. Some basic soldering skills come in handy, but you can get away without soldering if you don’t mind being careful with your creation.
With the motor controller attached to the system, I can dial-in the speed of the motor from a dead-stop all the way up to full speed. By cutting the speed to about 20%, the dolly will travel at roughly 1 foot per hour, which is perfect for those longer shots, and there’s still plenty of power to keep the dolly moving down the track.
If you want to control it via USB, the motor controller comes with a PC app that does the job very easily. Just connect the controller to your laptop, and set it to your desired power level (0-100%, forward or backward). They also provide some code examples, so if you’re a code-minded person, you might be able to write something for a smart phone.
With the analog controller, the results can be seen in the video above.
Concluding Thoughts
While working though the process of building this dolly system, I came up with several ideas for better models. This one has some limitations to go along with its advantages. While it is lightweight and easy to transport, and very flexible, it works best on level ground (or at least, set up so that the travel is level). My next one will probably be chain driven, and will use a rigid aluminum track.The motor controller pushed me a little over budget, but added so much extra functionality that I am convinced that it was well worth it.
And still, this model worked well enough for my experimentation, and cost a mere $80 to build.
Materials List
For the mechanical side of things, the materials were minimal:
Track and Cart:
- Track: 3/4″ x 10′ PVC or similar (2x) $2 each
- Cart Body: Piece of wood, 1′ x 1′ or larger, $5 or less, scrap may be free.
- Tripod head
Wheel Assemblies for Cart:
- Pair of used inline-skates $5
- 5/16″ inch bolts, 3″ long (2x)
- 5/16″ inch bolt, 3.5″ long (1x)
- locking nuts, 5/16″ inch (1 bag of 4) $1
- 5/16″ washers, (2 bags of 8) $2
- 3/8″ metal tube, cut for spacers
- brackets for mounting (3x)
- mounting screws for brackets
Electrical:
- geared motor $7
- motor controller $30
- 20 gauge wire, stranded
- potentiometer $5 (optional)
- battery holder $2
- solder
Misc.:
- black spray paint $4
