As a general rule, I use two flash units for outdoor portraits… sometimes three. When the situation demands it, though, nice portraits can still be made with a single flash unit.
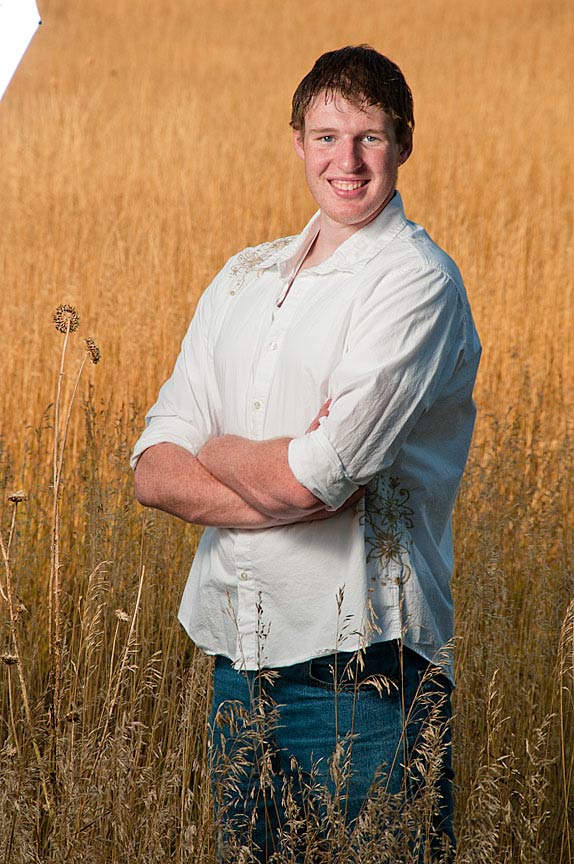
I did some senior portraits while in Colorado last fall. I don’t normally do senior portraits, but in this case, it was a nice interlude in my extended road trip, and my clients wanted to go beyond the standard head-shots / leaning against tree / etc formula that was so popular when I was in high-school… so it sounded like a good chance to experiment and have some fun, which we did (we did some traditional shots, too). We shot in several locations from late afternoon to the middle of the night over the course of several days.
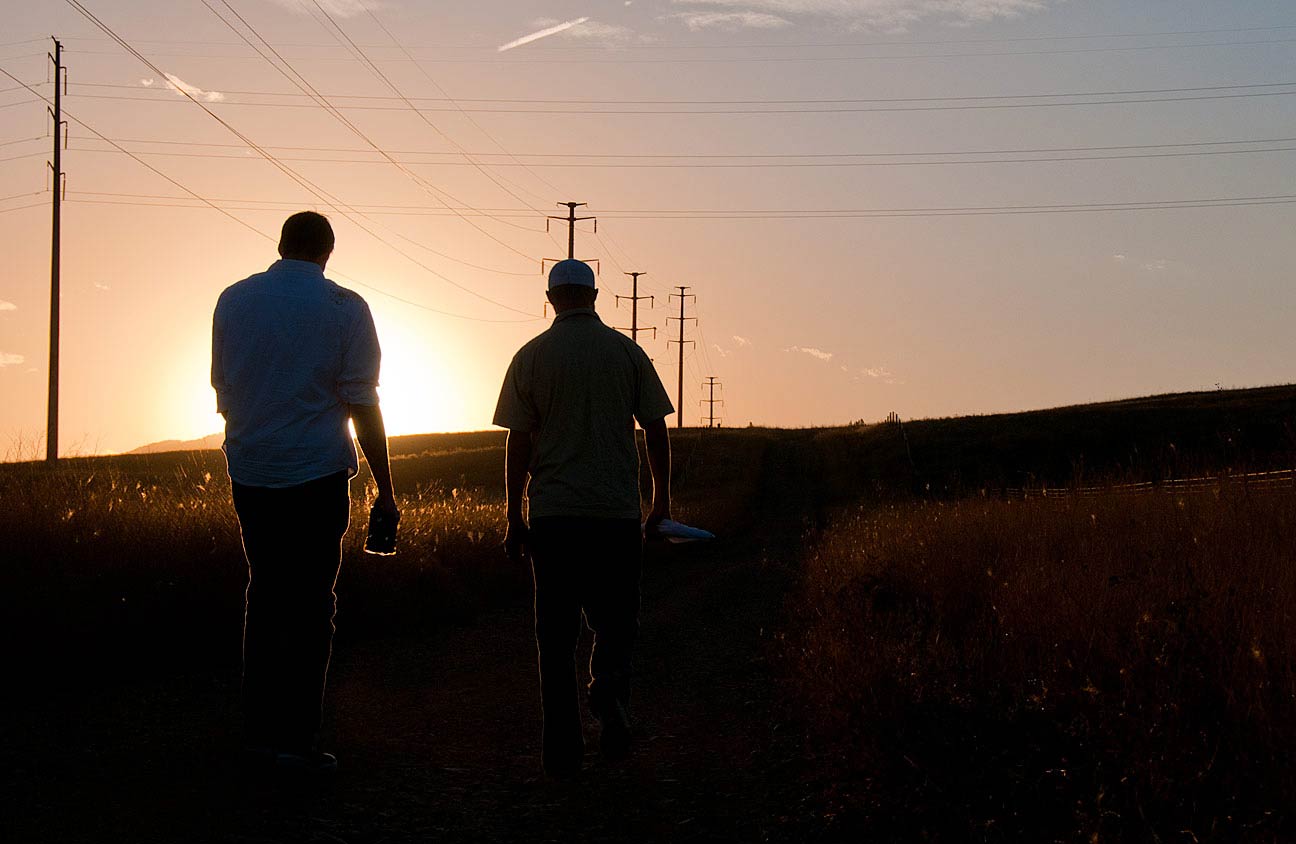
On this particular occasion, I had scoped out the location the previous day and decided that it would be suitable for late afternoon photos, though it was a 20 minute walk from the car. Unfortunately, the shoot preceding this one ran late, and by the time we arrived, the sun had already dropped behind the Rockies to the west of Boulder. I knew that this didn’t leave me with a lot of time, and I had two clients to shoot, so I decided to simplify and use a single flash.
Balancing Act
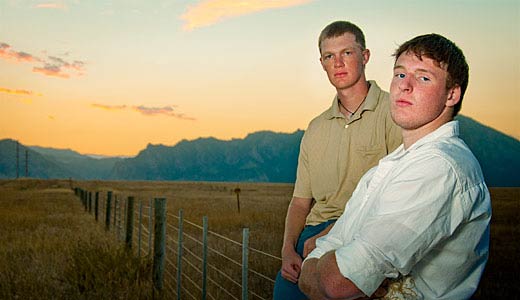
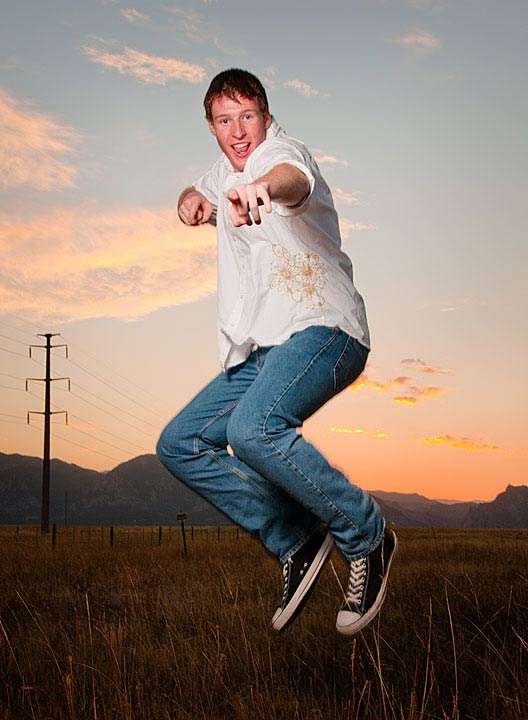
1. Positioning the Light: Using the flash on the camera gives very boring, flat light, so the first thing to do is decide on where the light should come from. When in doubt, about 45 degrees from the front plane of the face towards the narrow side (ie, the side turned away from the camera… not really relevant here) is generally safe, providing good contour, maintaining a catch light in the eyes, and still lighting a good portion of the face. In this case, I shot a little more straight-on (perhaps 20-30 degrees) because I was only using one flash and couldn’t count on a second one to fill in the shadow detail if too much of the face was in shadow.
Since this was a mobile setup, the flash was attached to an umbrella swivel-mount and a shoot-through, white 40″ umbrella rather, than a softbox. This type of umbrella is nice and compact, weighs very little and is quick to set up. The swivel mount can then either be attached to a light-stand or a tripod, or held by an assistant. Since I was working with two guys that evening, it was quick and easy to have the second hold the flash. When positioning the flash, I try to get the umbrella as close to the subject as possible while staying out of the photo. This provides a softer quality to the light and more control over the luminance of the flash unit.
The flash that I used on this shoot was an old Sunpak 622 Pro, which is a large handle-mount flash powered by 4 C-size batteries that I carry sometimes when I think I may need more power than I can get from a Speedlite. The unit was triggered by a Radiopopper JrX Studio.

2. Background / Shadow Exposure : I generally shoot with flash in manual exposure mode, so that’s how I’ll explain it, but the same general procedure can be applied if you’re using eTTL/iTTL and semi-automatic.
There are three things that I wanted to balance in these photos: the background exposure, the subject dark-side, and the subject light-side.
I begin by metering (not using the flash) the subject and getting a correct exposure. Then, I set the camera to under-expose the subject by about 1.5 f-stops; this will set the exposure for the subject’s shadow-side. In setting the exposure, it’s important to keep in mind that the shutter speed must be slower than the camera’s maximum sync speed… usually around 1/250th sec. these days.
Then I look at the background. If the background is still brighter than I would like, I cut the exposure even further. Doing so means that the shadow-side of the subject will be quite dark, so I either have to abandon the single-flash approach and add an equivalent amount of light back into the subject with a fill-flash next to the camera, or simply accept the loss of shadow detail. In this case, the background was fine with my initial shadow-side exposure, so I was able to continue without another fill flash.
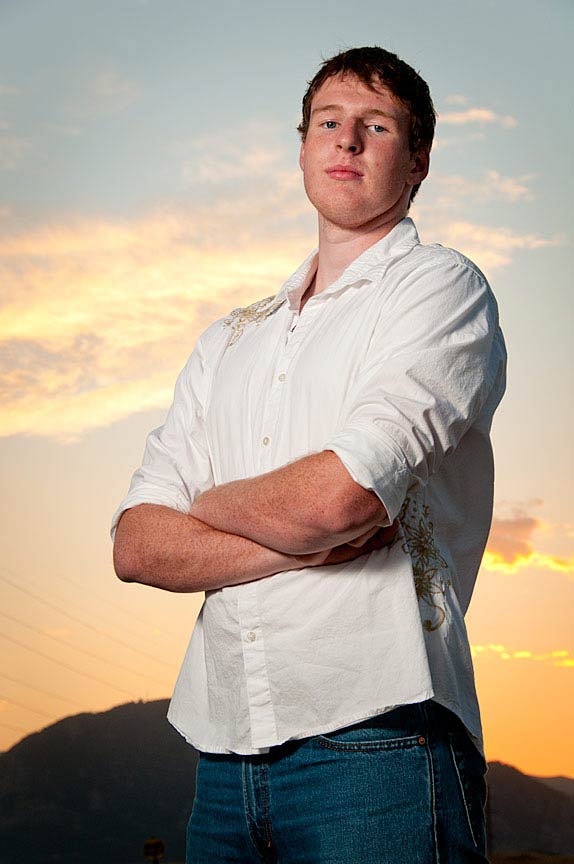
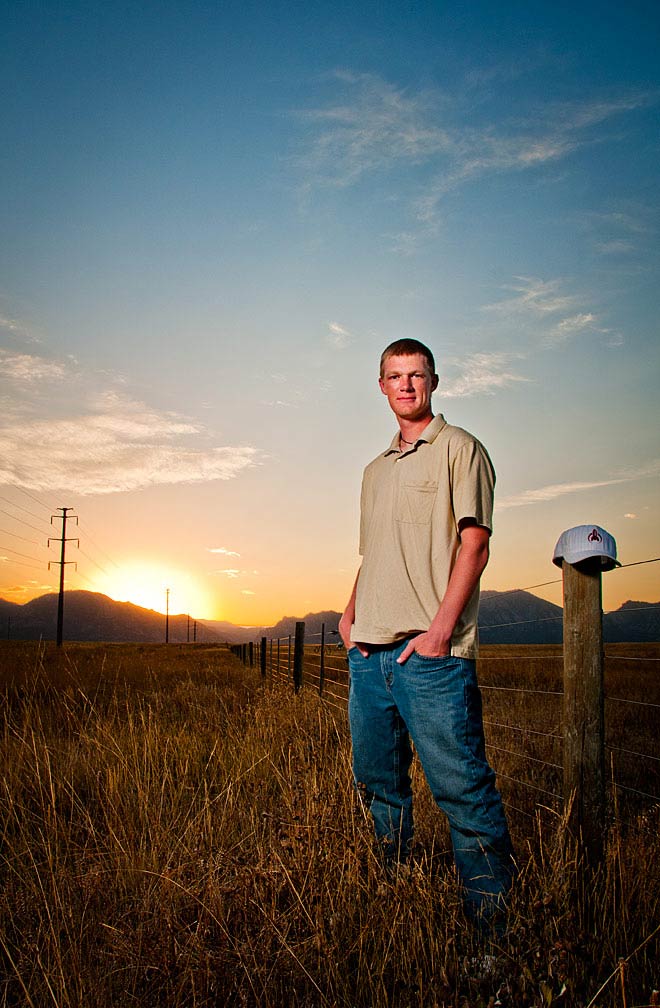
3. Subject Exposure : Finally, I turn on my main flash (aka, “key light”).
In manual mode, flash units are generally controlled by full f-stops: they can be shot at full-power, half-power, quarter-power, etc, on down to 1/128th power or less. I take a test shot at 1/4 power or so and check my LCD and histogram to see if my image looks good (having already set an exposure and ISO in my camera based on what I think will work with the flash I’m using… this takes a little experience). If it’s still under-exposed, I can increase the flash power up to 1/2 or full. If I’m clipping highlights (or otherwise over-exposing), then it’s a simple matter to cut the power on the flash.
If I still don’t have enough light at full power, or if I simply want to take control of matters from my camera, I can open the aperture and cut the amount of time the shutter stays open. The larger aperture lets in more light, so the entire image will be brighter, and the change in shutter speed will darken the background back down. However, flash is not effected by shutter speed (since the flash duration is much shorter than the shutter speed, and assuming that you’re working within the camera’s flash sync speed), so the subject remains brighter. Understanding this fact is what gives you complete control over your flash photos.
For the same reasons, as it got later and darker, I could simply lengthen the shutter speed. Doing so allows more of the ambient light to reach the sensor, thus brightening the background and shadows, but since all of the light from the flash is already being captured regardless of shutter speed, the brightness of the areas lit by flash remains virtually the same.
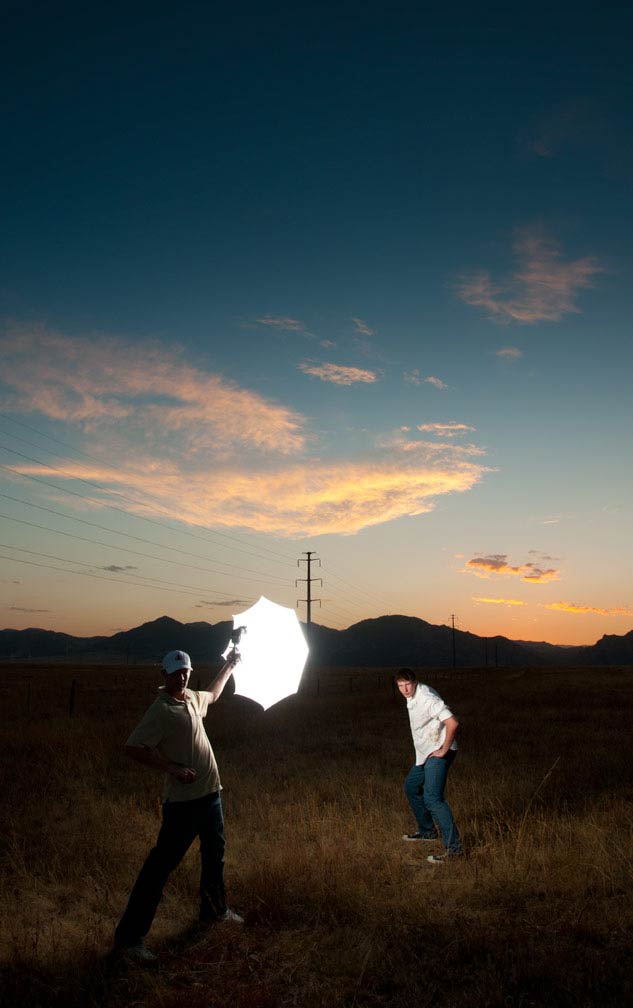
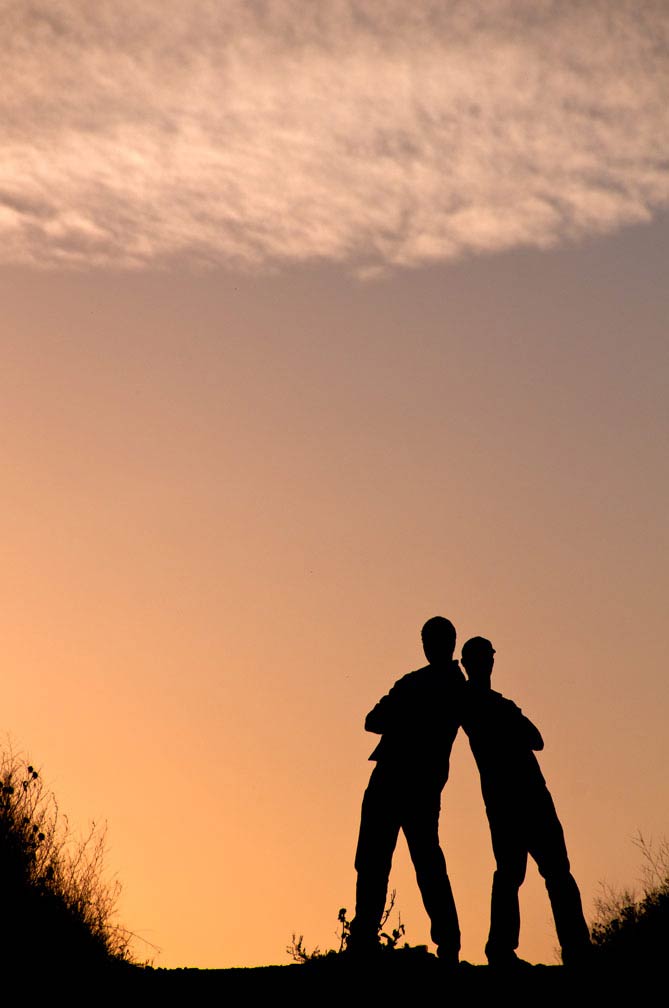
One of the great advantages of shooting portraits in pairs (when two friends are involved) is that, aside from having a free assistant nearby, it can be a huge help in keeping the atmosphere loose and fun. In this case, the guys were able to laugh and joke around, offer honest appraisals of each others expressions, etc, all while I was focusing on exposure and the bigger picture.
Lighting Equipment Used:
- Sunpak 622 Pro ($50-100) and Nikon SB-24 ($60-80), but almost any flash with manual control made after the 1970’s would be fine, and since they’re used off-camera, you can use a Nikon flash with your Canon camera and vice-versa.
- 43″ shoot-through umbrella ($5-30). I use a double-fold model ($19) so that it’s easy to carry around, but that’s not necessary.
- Umbrella Swivel-Mount ($10-30) I used a Photoflex, but even cheaper ones can be found on Ebay for $5. I prefer models with a strong, metal cold-shoe for mounting a small flash.
- Radio Trigger ($20 – $500). Pocket Wizards are the industry standard and never fail, but they’re a bit expensive. Shooting in manual mode, you don’t need the fancy features of many modern triggers, so PW Classics are fine, but Radiopopper JrXs are just as good and a lot less expensive. Cheap triggers can be had for $20-25, but they’re rarely reliable beyond 20 feet (as opposed to a mile or so with a Pocket Wizard).